Recommended Browsers
How to Enable Microphone in BBB
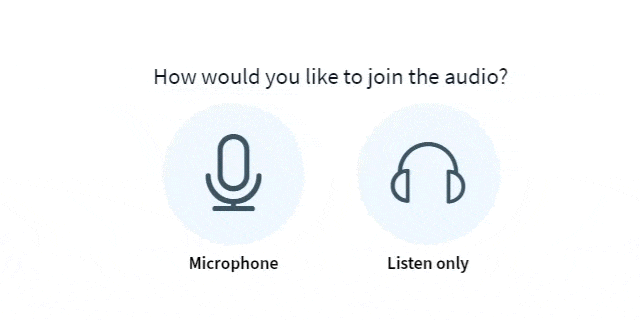
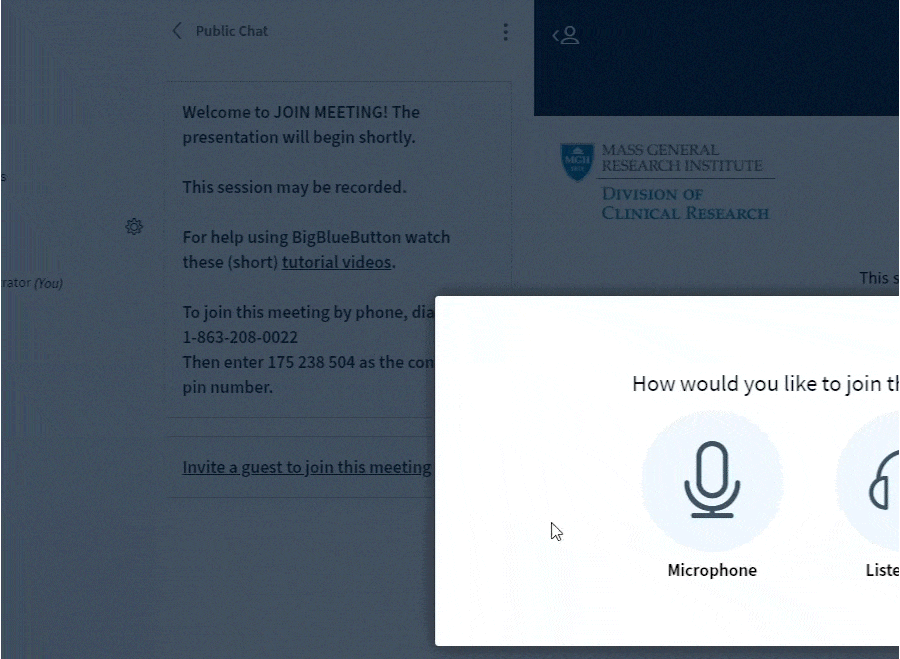
- When you join a BBB session, you will be prompted to connect to the audio. Select Microphone if you want people to hear you, else select Listen Only if you are not using your mic.

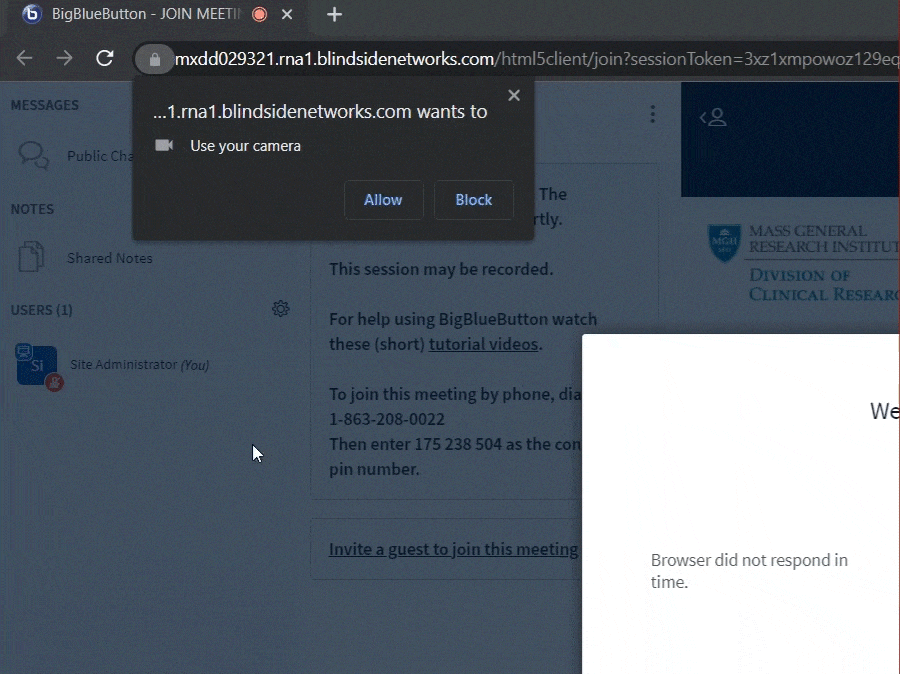
- When you select Microphone, your browser will prompt you for permission to access your microphone. Be sure to select Allow.

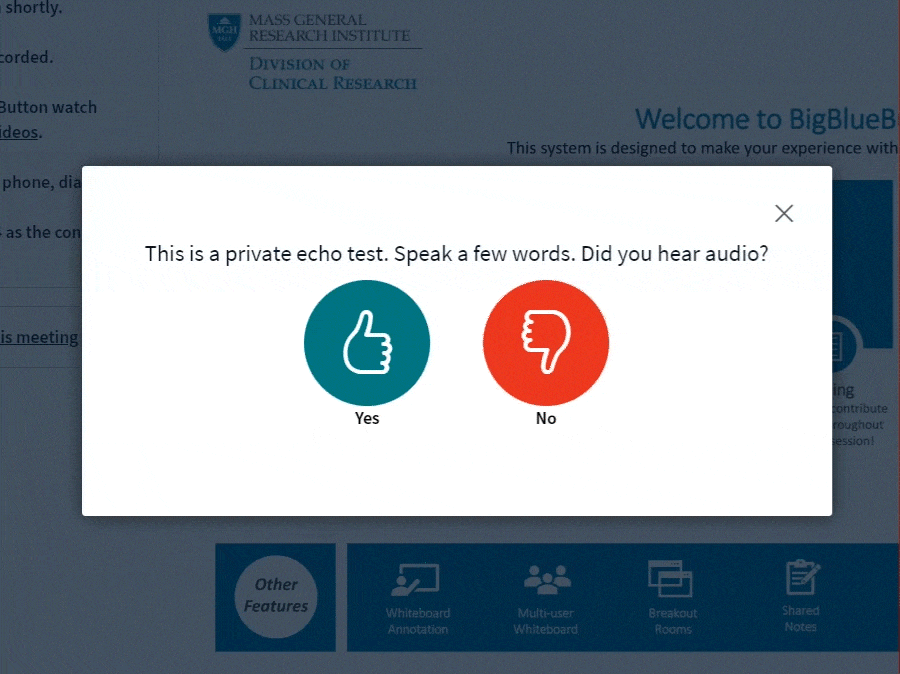
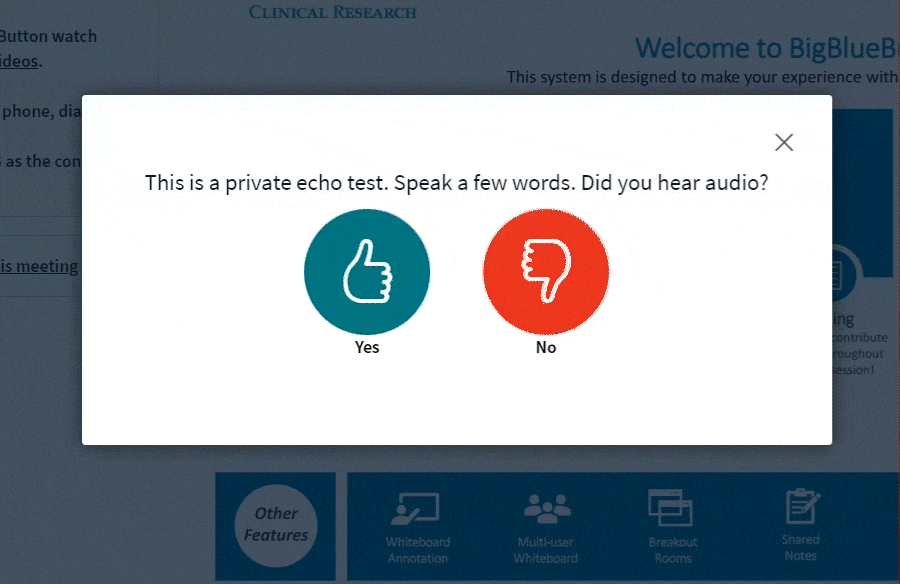
- Next, you will enter a private echo test to check that your microphone is working. If you hear yourself, select Yes.

- If you do not hear yourself, select No. The Change Audio Settings dialog will appear with the option to change your audio settings for microphone source, speaker source. Test your speakers by selecting Play Sound. Once finished, select Retry to re-enter the echo test to confirm that your microphone is working.

- After joining audio with microphone, you will see a microphone icon next to your name.
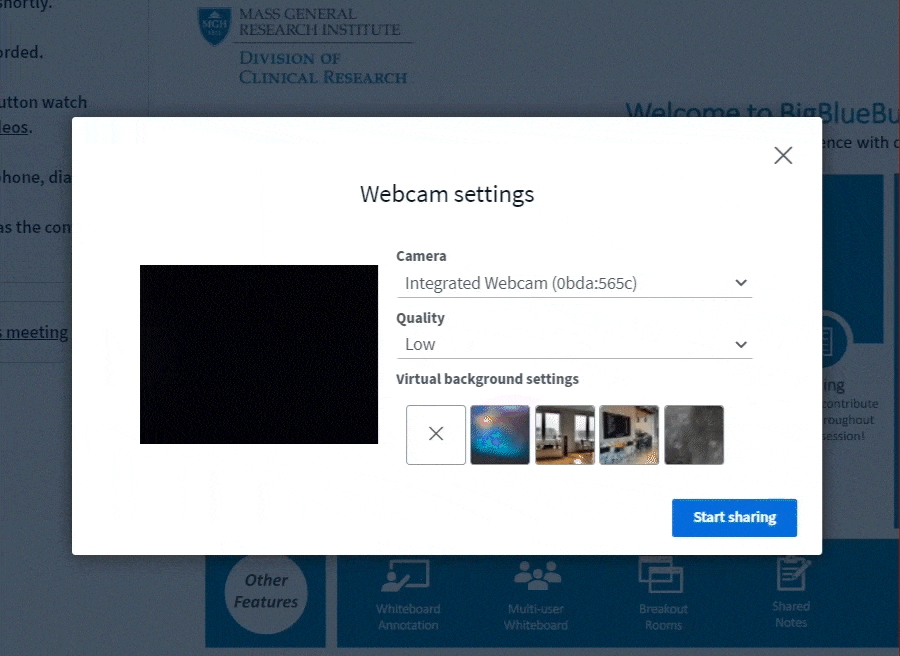
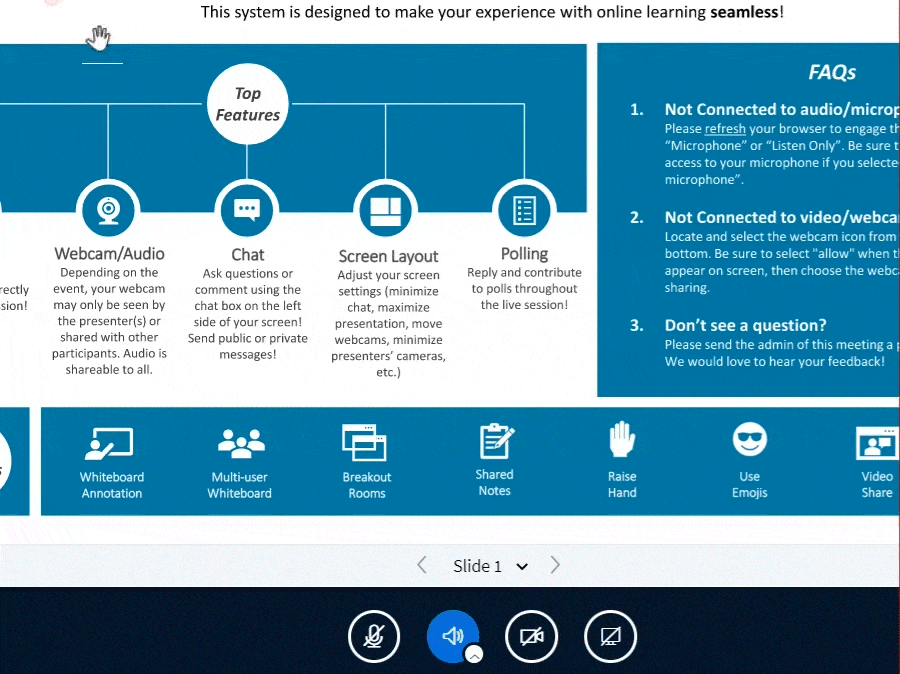
How to Enable Webcam in BBB
- To share a webcam, select the webcam icon from the media bar, located in the bottom center of the BBB interface.
- Your browser will prompt you for permission to use your camera. Be sure to select Allow.
- Next, choose your camera device, select a quality, and start sharing.

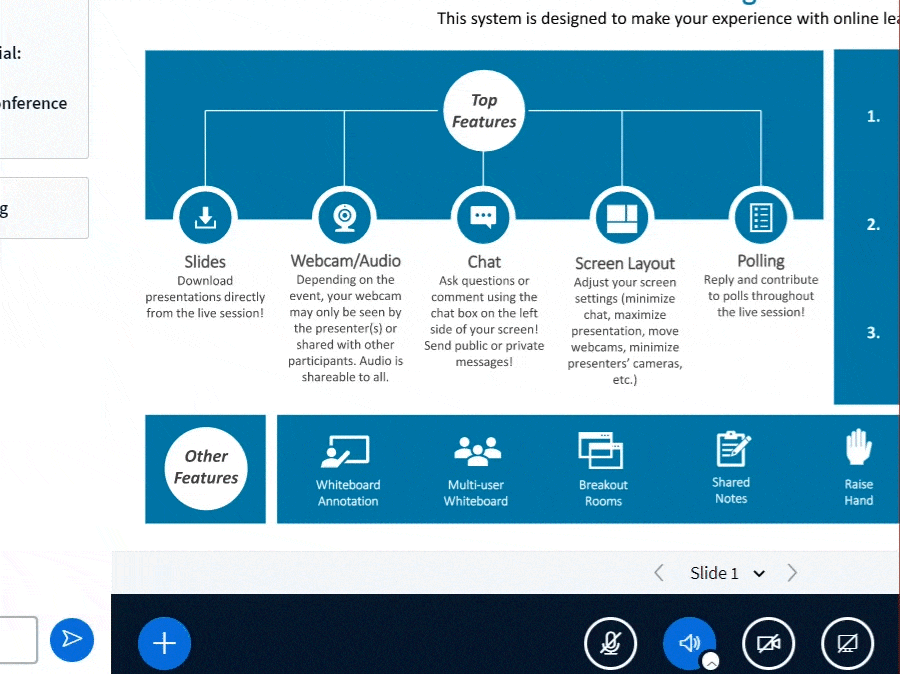
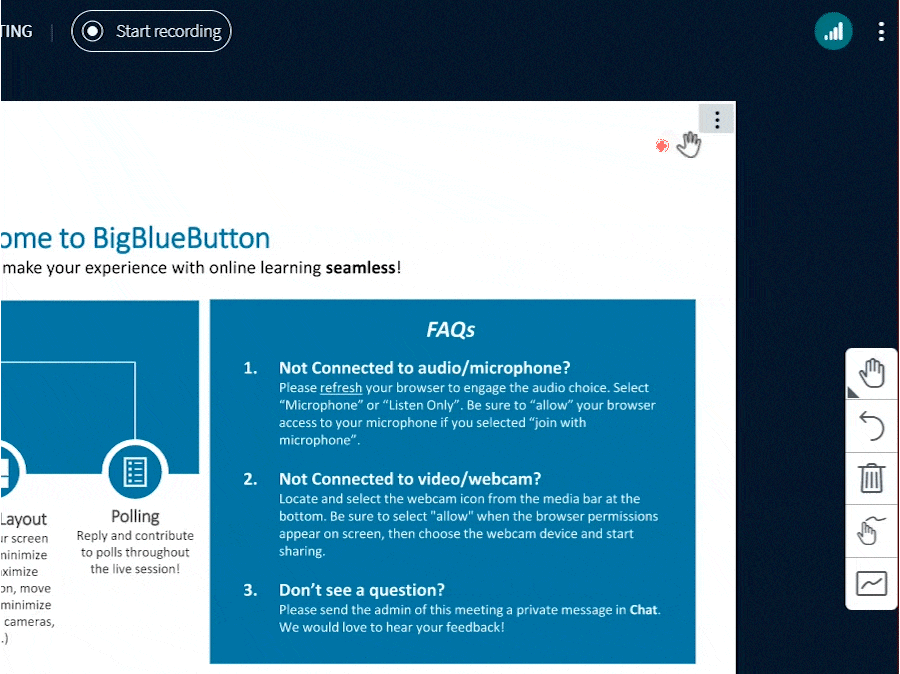
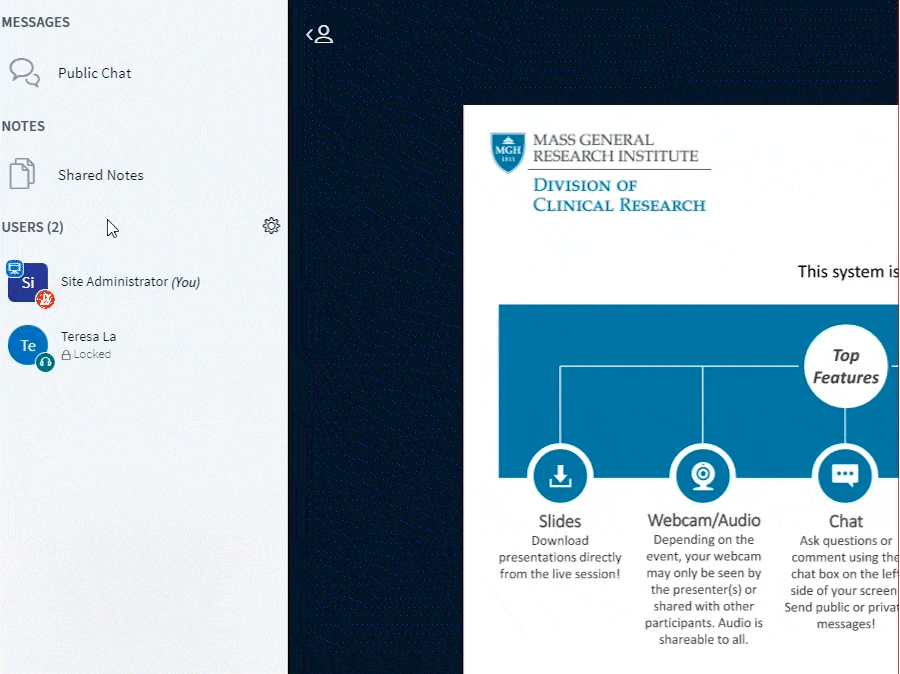
What are the Layout Options?
- You can customize the layout of your BBB session in two ways. The first way is select the users list toggle in the upper left-hand corner. This will minimize or hide the users list and messaging panels, giving preference to the presentation.
- You can also select the public chat toggle in the upper-left hand corner to minimize the messaging panel, giving preference to user list panel and presentation.
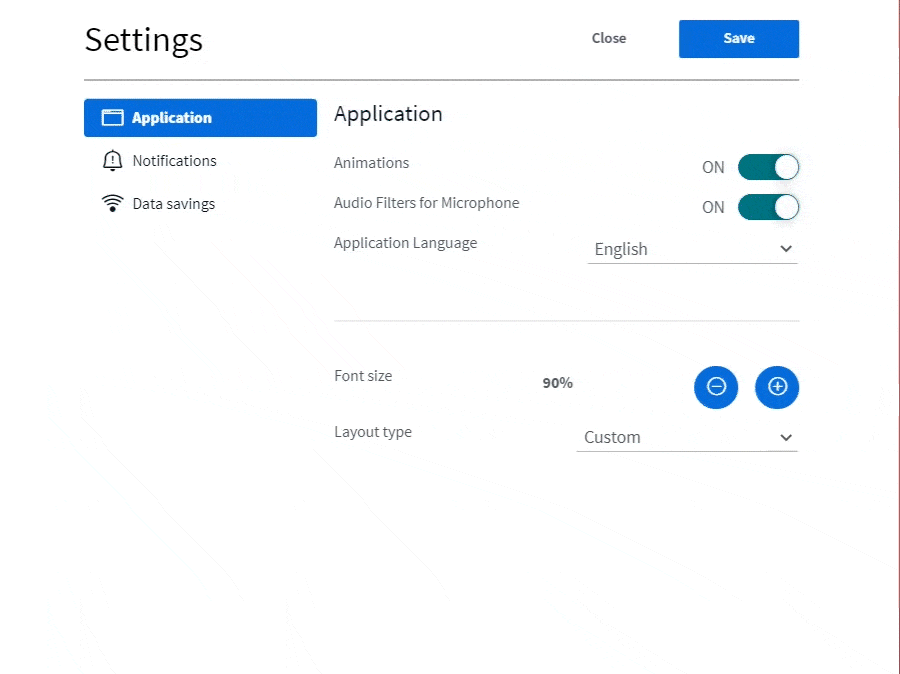
- The second way is to select the options ellipse button in the upper-right hand corner, then select the settings option.
- On the settings page, select the layout type dropdown button and choose from the following options: smart layout (default), focus on presentation, or focus on video.
- To make the BBB session full screen, select the options ellipse button in the upper-right hand corner, then select the make fullscreen Press Esc on your keyboard to exit out of full screen.

To share a screen, please use a desktop, laptop, or Chromebook (screensharing is not supported on mobile devices is not supported).
You have the option to share your entire screen or an application window from your local desktop or laptop device.
IMPORTANT NOTES
You have the option to share your entire screen or an application window from your local desktop or laptop device.
- If you are a viewer, you will need to request presenter status from the moderator. Click on the Actions menu on the bottom left-hand corner and select Take Presenter.
- Once you have the presenter status, a presenter icon will appear over your name.
- Select the Screen Share icon found in the media bar of the BigBlueButton interface. Be sure to open any applications or additional browser windows you wish to share before engaging screensharing.
- If you are using Chrome browser or a Microsoft Edge tab, you will be prompted to choose either Your Entire Screen, or an Application Window, a Chrome Tab, or a Microsoft Edge Tab. Select your preferred screen or tab. Select Share system audio on the left-hand corner if you want to share audio content while screensharing. Finally, select share.


IMPORTANT NOTES
- When using screen share, you will not be able to see the BBB session. You will need to switch back and forth from your shared screen to the BBB browser. If you have dual monitors, you may choose to display the BBB browser on one screen and the shared application window or chrome tab on another screen.
- When sharing Your Entire Screen, users will see your screen even when you navigate to another browser or window.
- When sharing An Application Window, users will only see the application selected. If you navigate outside the chosen application, users will not see your actions.
- When sharing a Chrome Tab, users will only see the chosen tab. If you navigate outside the chosen tab, users will not see your actions.
How to Upload a Presentation
You can upload your PowerPoint slides or other documents (please use PDF files only) into the BBB presentation area. This is an alternative option to screenshare.
- If you are a viewer, you will need to request presenter status from the moderator. Click on the Actions menu on the bottom left-hand corner and select Take Presenter.
- Once you have the presenter status, a presenter icon will appear over your name.
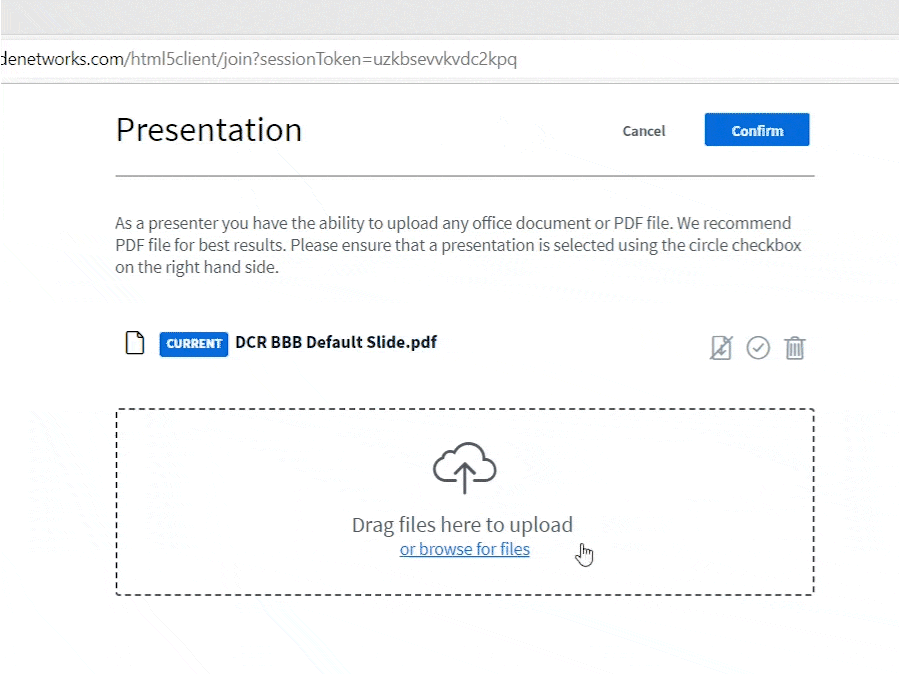
- To upload a PDF file, select the Actions menu in the lower left-hand corner of the presentation window, then choose Manage presentations.
- The BBB presentation upload screen will appear. You can drag and drop the files into the uploader or browse for files on your device.
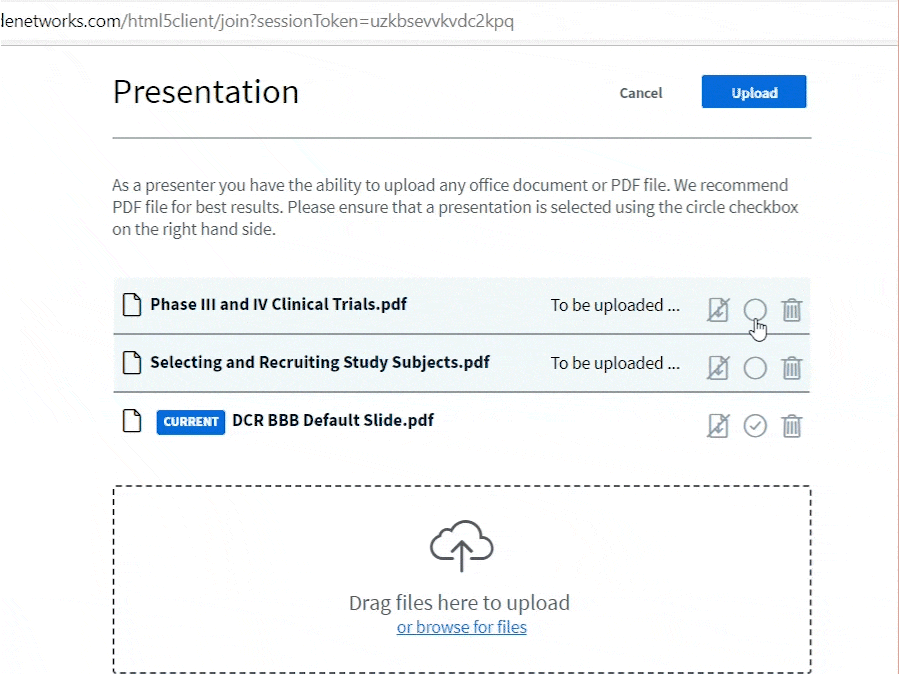
- If you are uploading multiple files at once, select the file you’d like to be displayed by default, then check the green circle to the right of the document.
- Once you have selected your file(s) for upload, click Upload. Depending on the size of the document, it may take several minutes for it to upload.
- Once you have uploaded all of your presentations or documents, you can switch between them. Select the Actions menu in the lower left-hand corner of the presentation window, then choose a presentation or file from the uploaded options.


How to Use the Presentation Control if You Uploaded a Presentation
If you uploaded your presentation (PDF format is recommended) into the BBB presentation area, you have the ability to control the navigation and visual orientation of the content displayed.
IMPORTANT NOTES
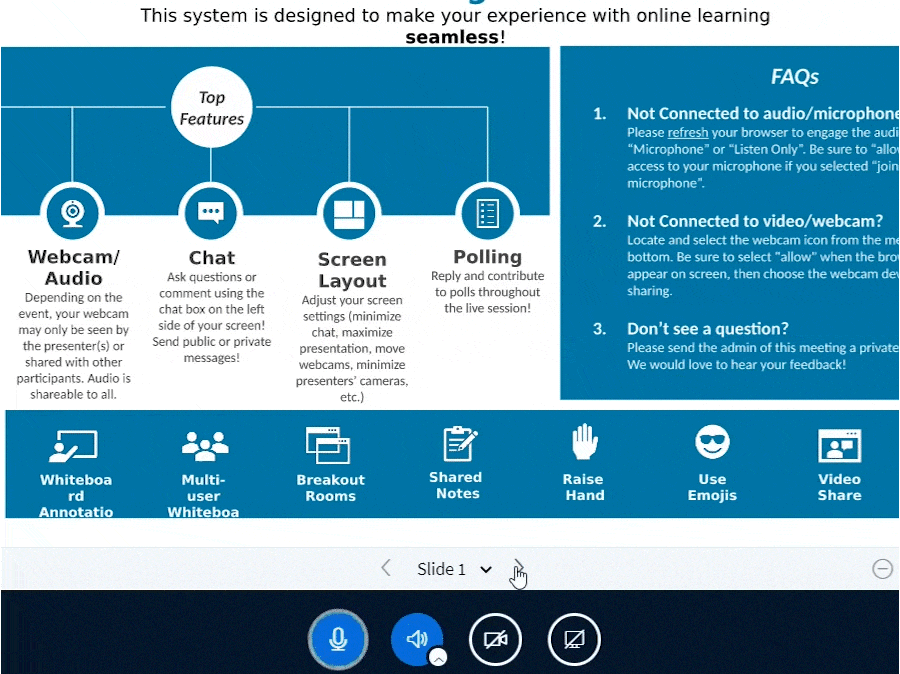
- The presenter slide/content control panel is located under the presentation display and above your media control icons.
- Use the Slide Navigator to navigate through your content.
- Skip to a specific slide by selecting a slide number from the dropdown button.
- Use Zoom In (+) or Out (-), use Fit-to-width, or engage full screen mode.


IMPORTANT NOTES
- Animations do not work in PDF files, so please plan around how you want to present your content when uploading your presentation to BBB.
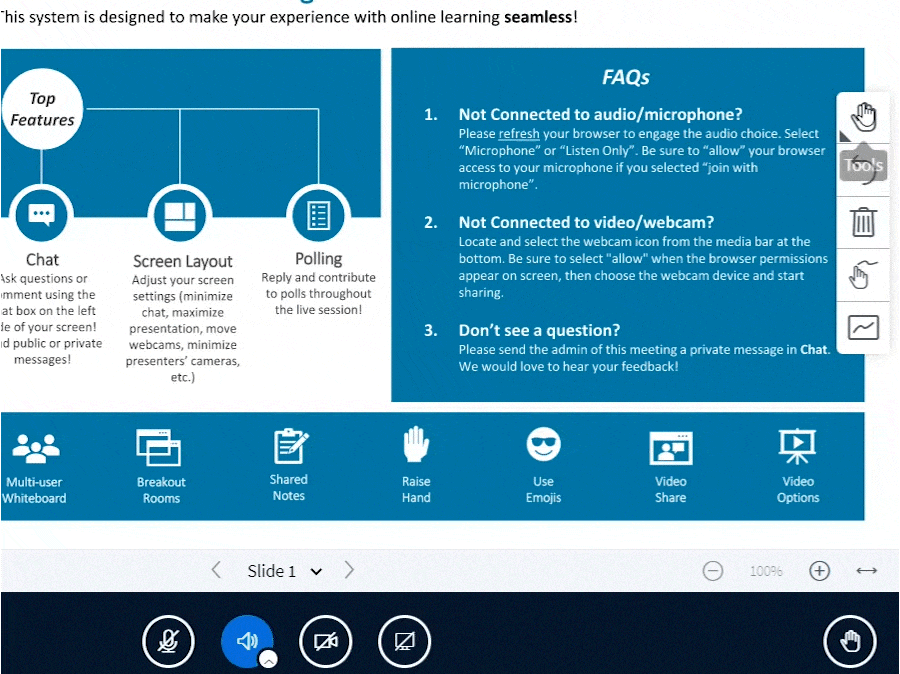
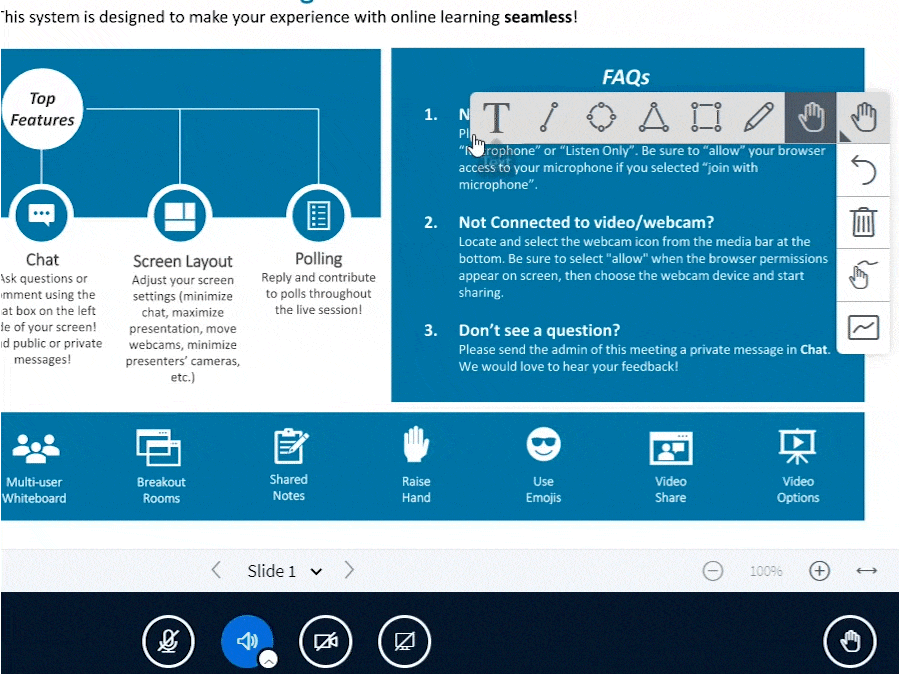
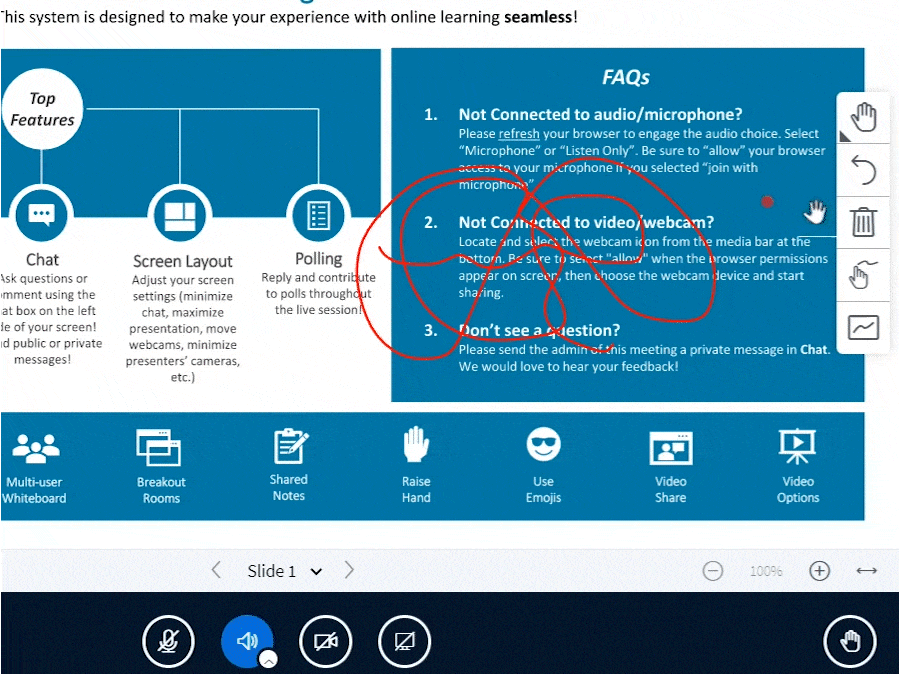
How to Use Slides/Whiteboard Annotations
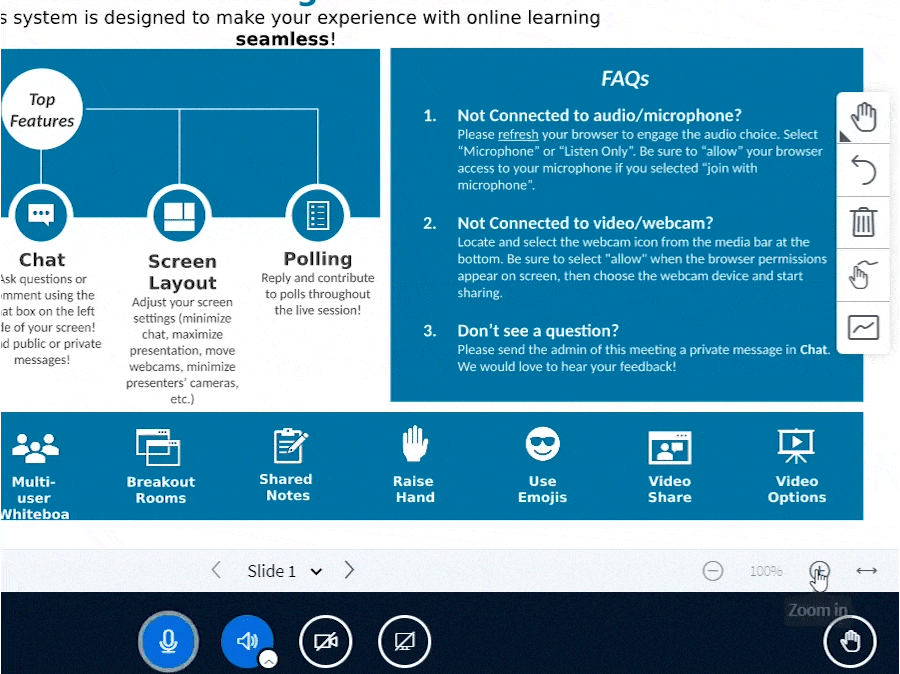
- The presenter annotation tool is located to the right-hand side of the presentation display.

- By default, the Pan tool is enabled.
- Select the Pan tool to display other whiteboard tools:
- Text input
- Line
- Ellipse
- Triangle
- Rectangle
- Pencil
- Pan/pointer (default)
- Select the trash icon to remove all annotations on the slide/whiteboard.
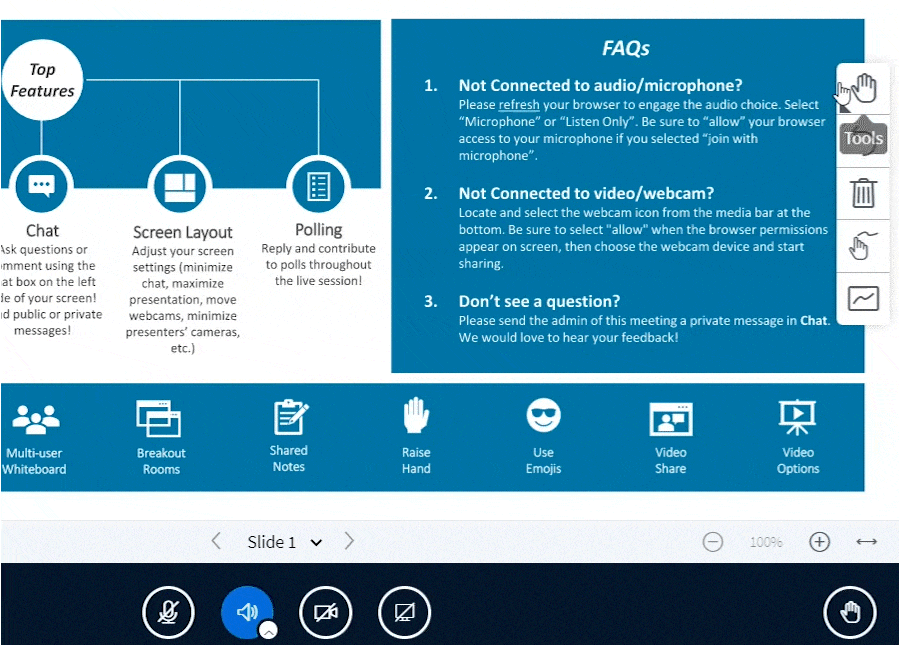
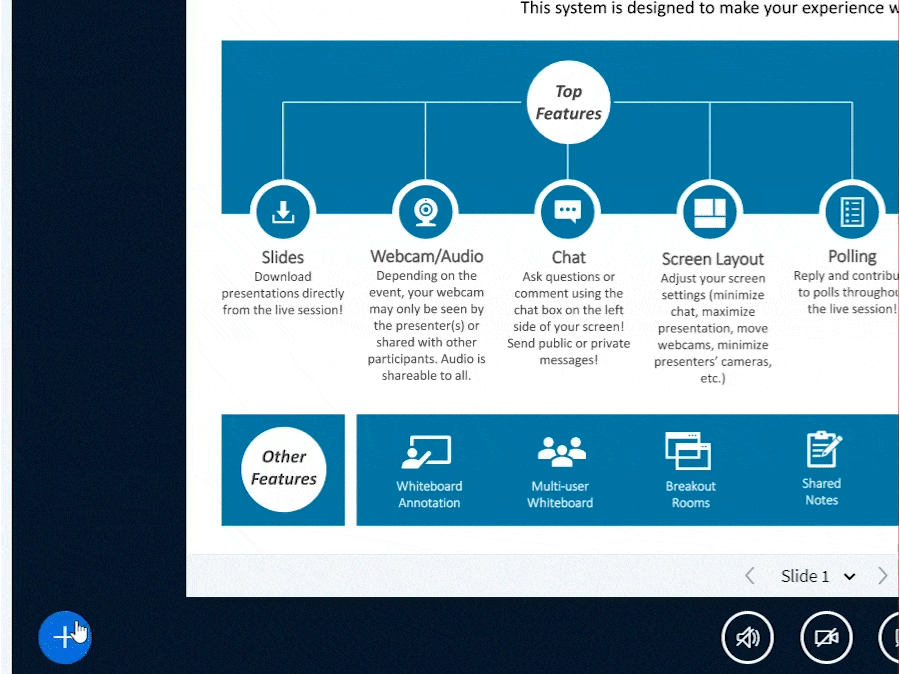
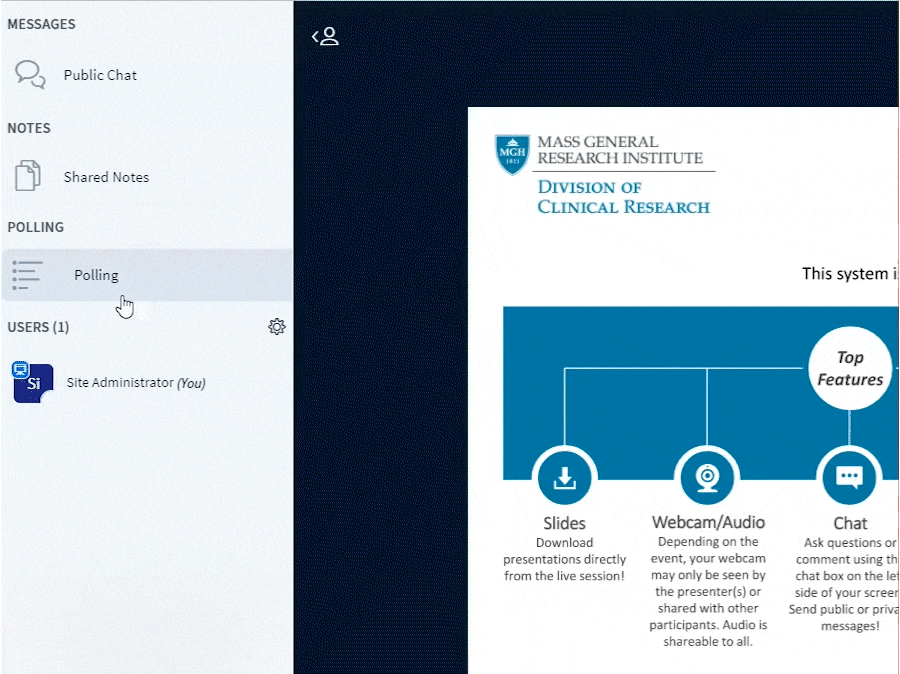
How to Use Polling
Use polls to engage students in BBB. You can use polls to perform test/exam or pop quizzes, and collect information about your learners.
- As a Moderator, you will be able to use polls. If you are a viewer, you will need to request presenter status from the moderator. Click on the Actions menu on the bottom left-hand corner and select Take Presenter.
- Once you have the presenter status, a presenter icon will appear over your name.
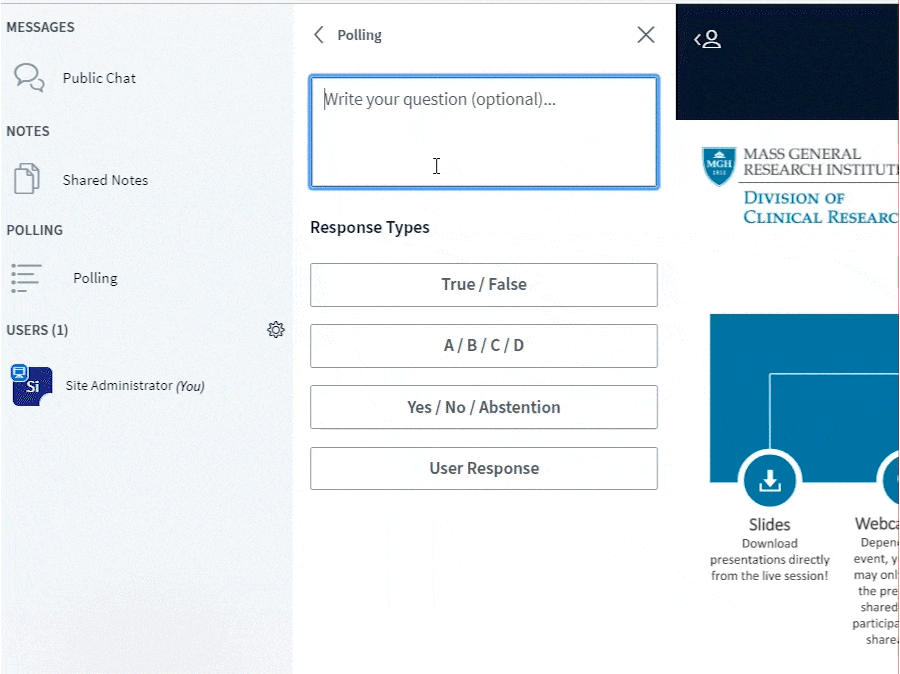
- To start a poll, click on the Actions menu in the lower left-hand corner of the presentation window, then select Start a poll.
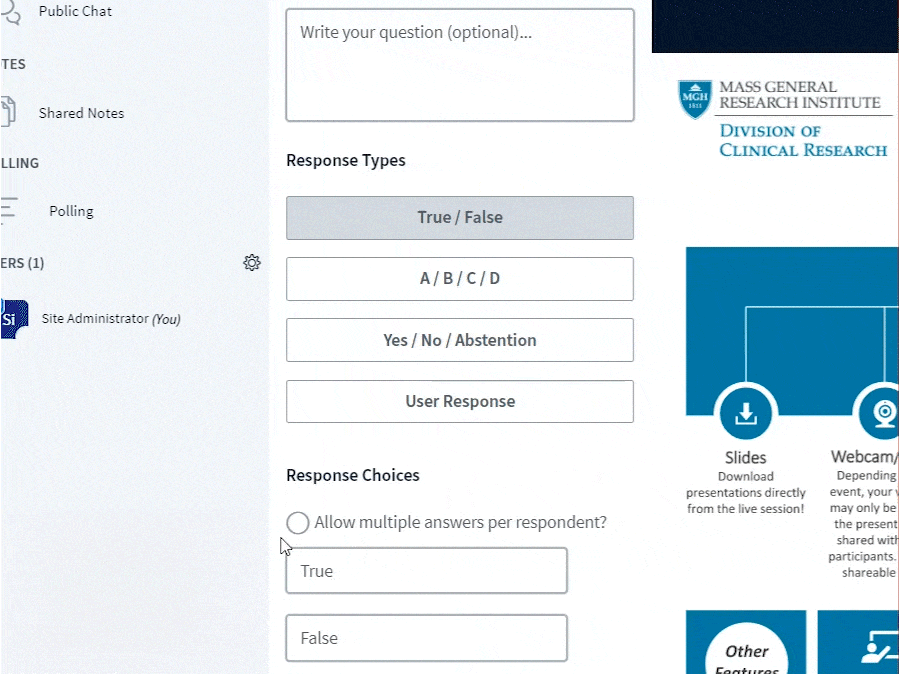
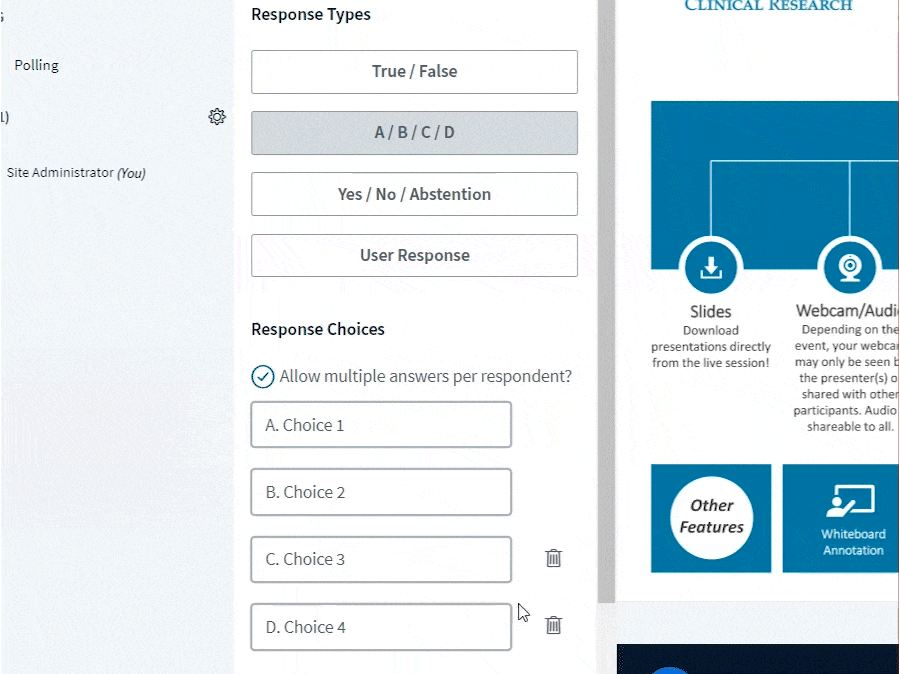
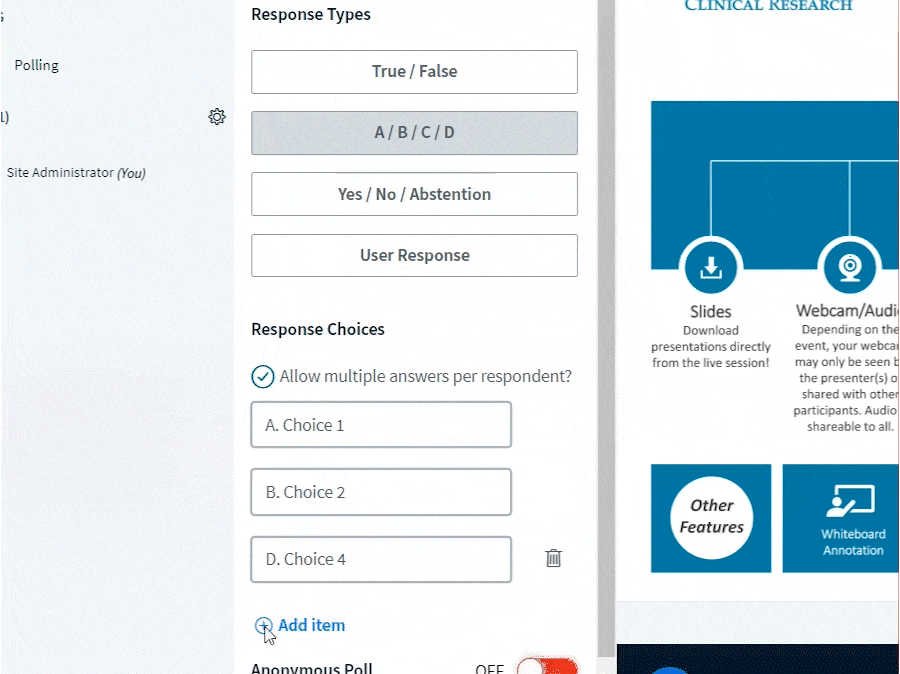
- The polling menu will open with several options. You can write your question in the question input field (optional) or display your question on your slides. Choose from four different response types: true/false, multiple choice, yes or no, or user response.
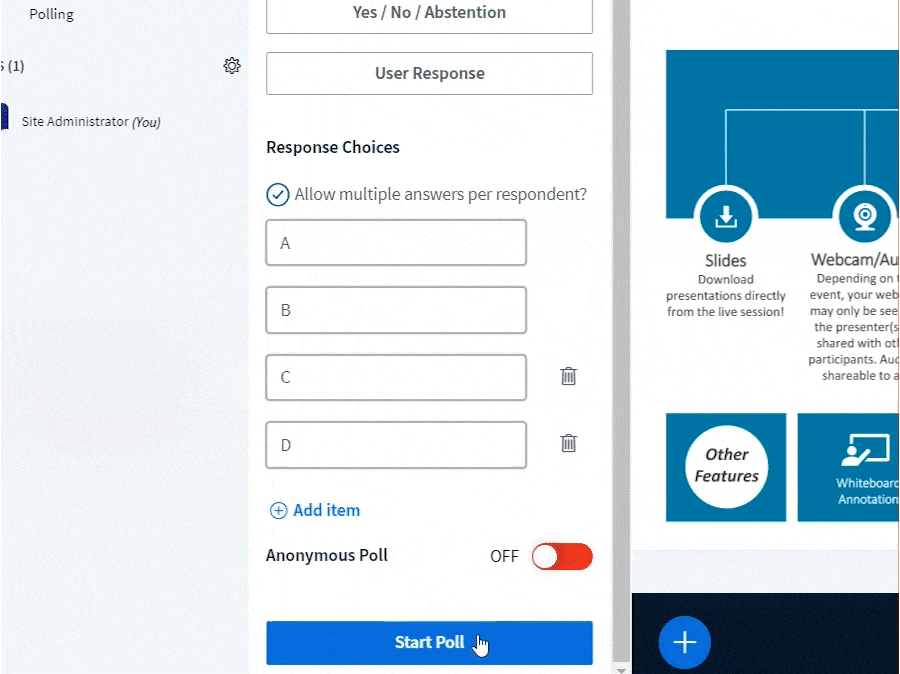
- You can customize your response choices after selection of a response type and decide if you want to allow multiple answers per respondent.
- You can delete or add response choices. To delete a choice, click on the trash icon next to the response choice you wish to delete.
- To add a choice, click on Add item.
- Select Start Poll to launch the poll.
- You can view live responses to the poll in the Polling panel which is above the Users list panel. Select Publish to publish the results and end the poll.
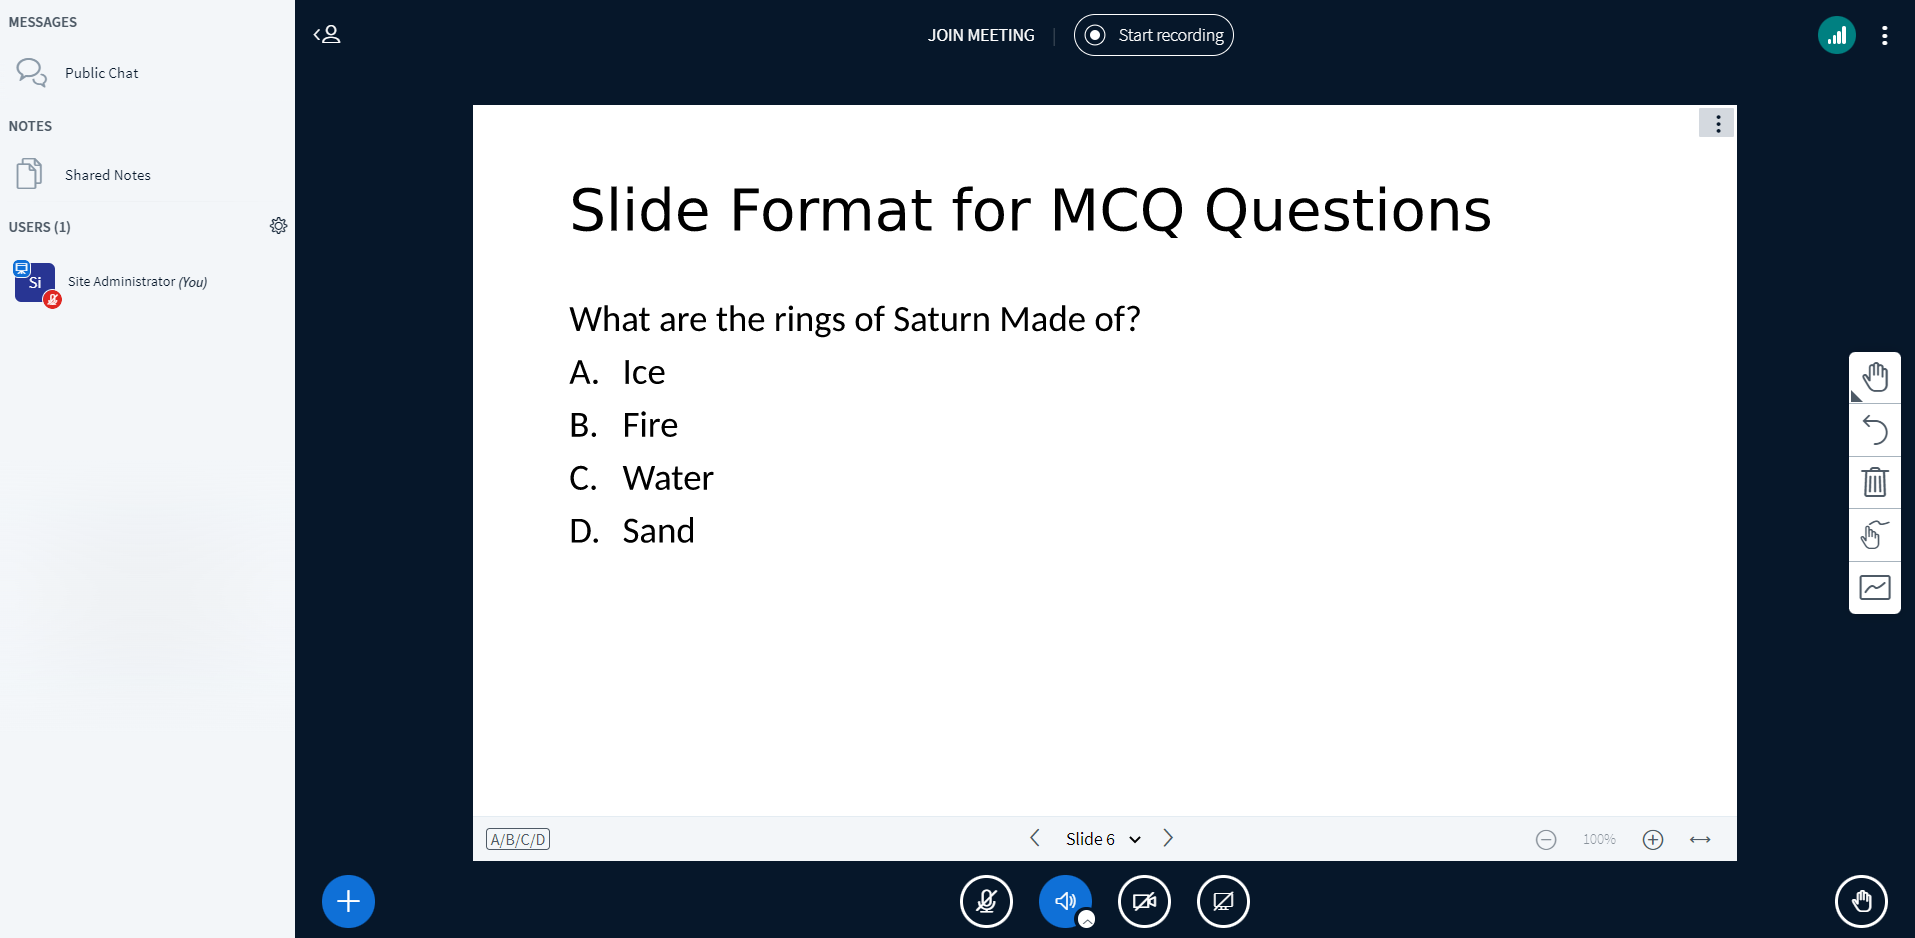
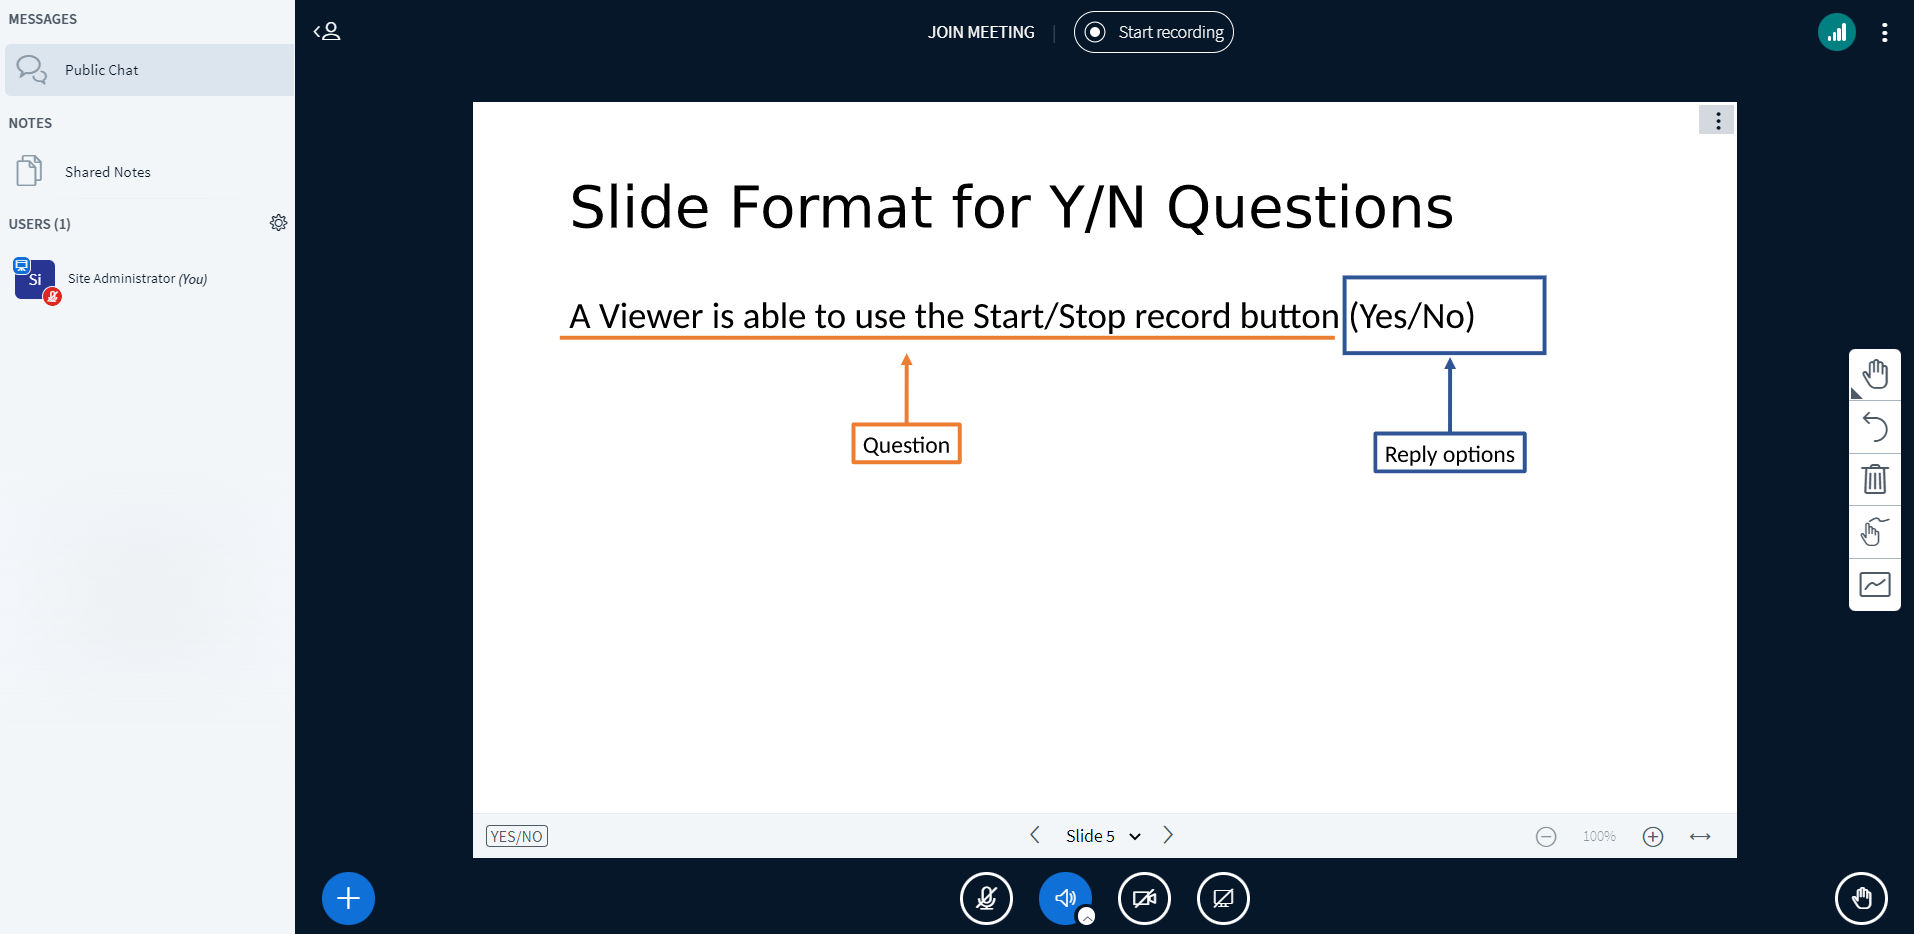
How to Use Smart Slides for Polling
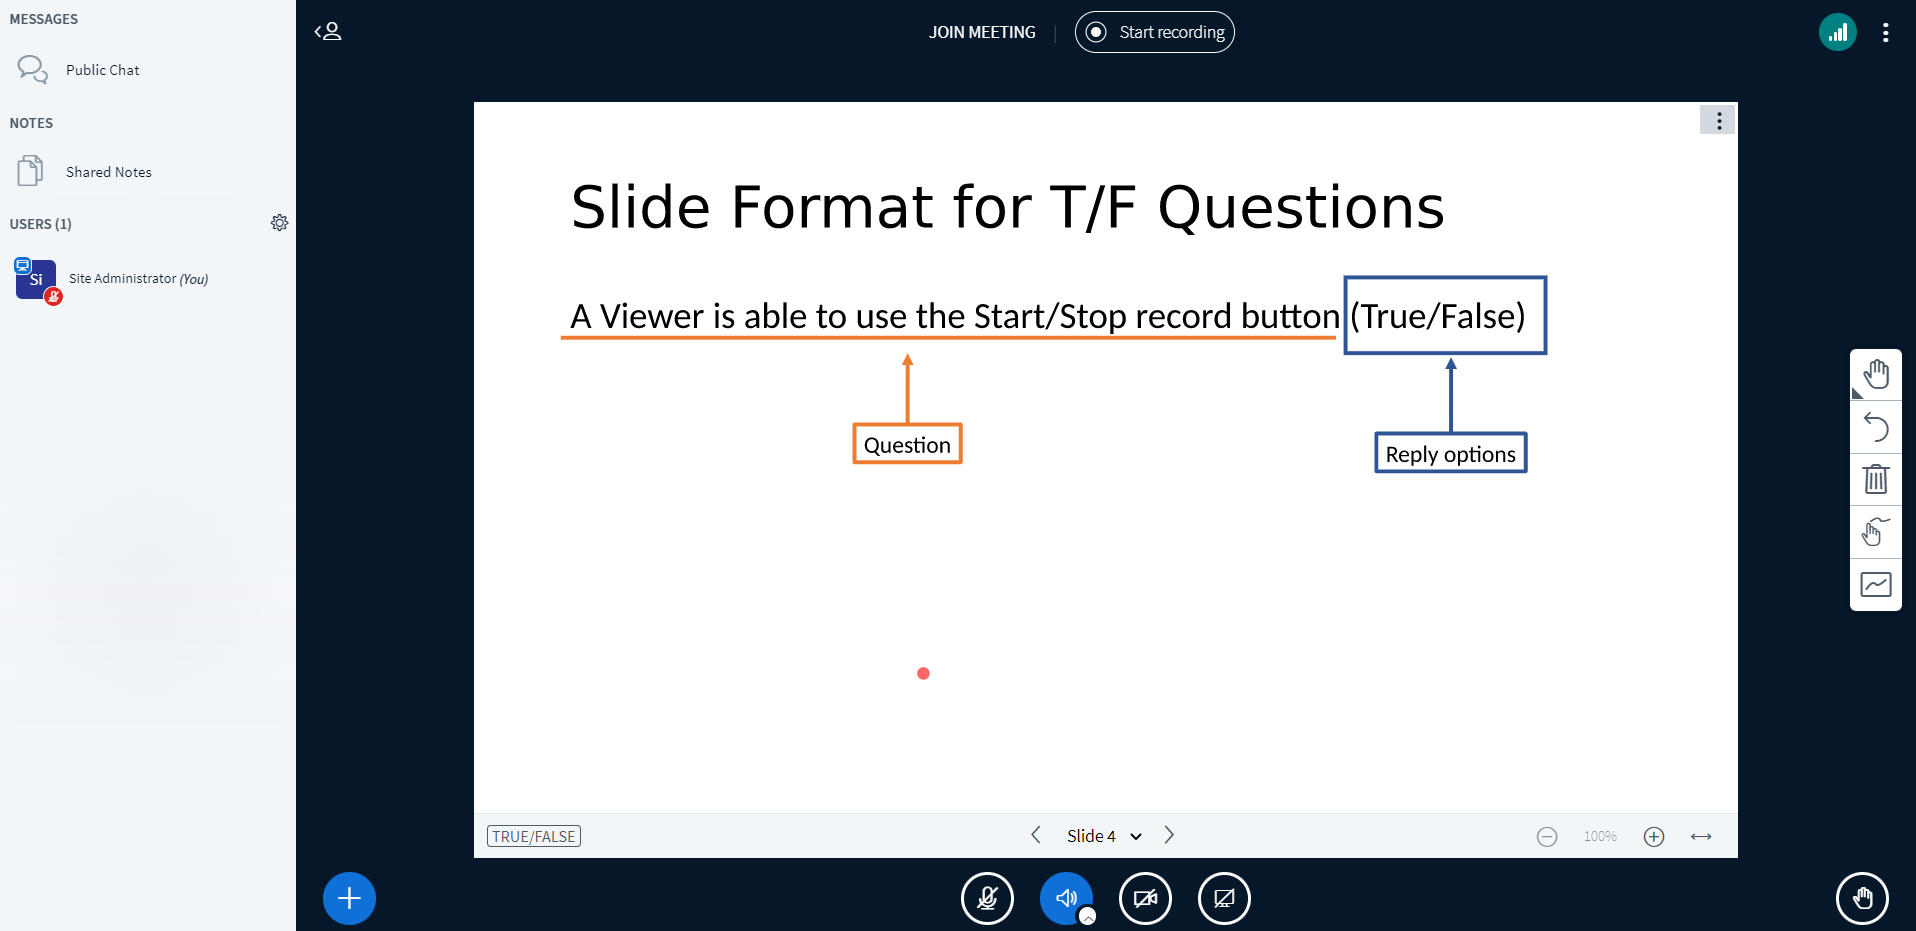
Smart slides enable you to prepare a polling slide deck in advance. With smart slides, BBB detects when a question is being posed and provides a quick polling option to the presenter. To create smart slides, please make sure you follow BBB’s question format: “question” followed by “reply options.
- For true/false questions, use the following format:

- For multiple choice questions, use the following format:

- For yes/no questions, use the following format:

- When the question format is displayed, BBB detects the intended poll and provides you with a Quick Polling button. Select the button to publish the poll.

How to Create Breakout Rooms
Breakout rooms are a great way to encourage small group discussion, collaboration, and cooperation amongst learners in your class. Moderators have the ability to create and manage student breakout rooms.
- If you are a viewer, you will need to request presenter status from the moderator. Click on the Actions menu on the bottom left-hand corner and select Take Presenter.
- Once you have the presenter status, a presenter icon will appear over your name.
- Click on the settings icon in upper right-hand corner of the Users panel, then select Create breakout rooms.
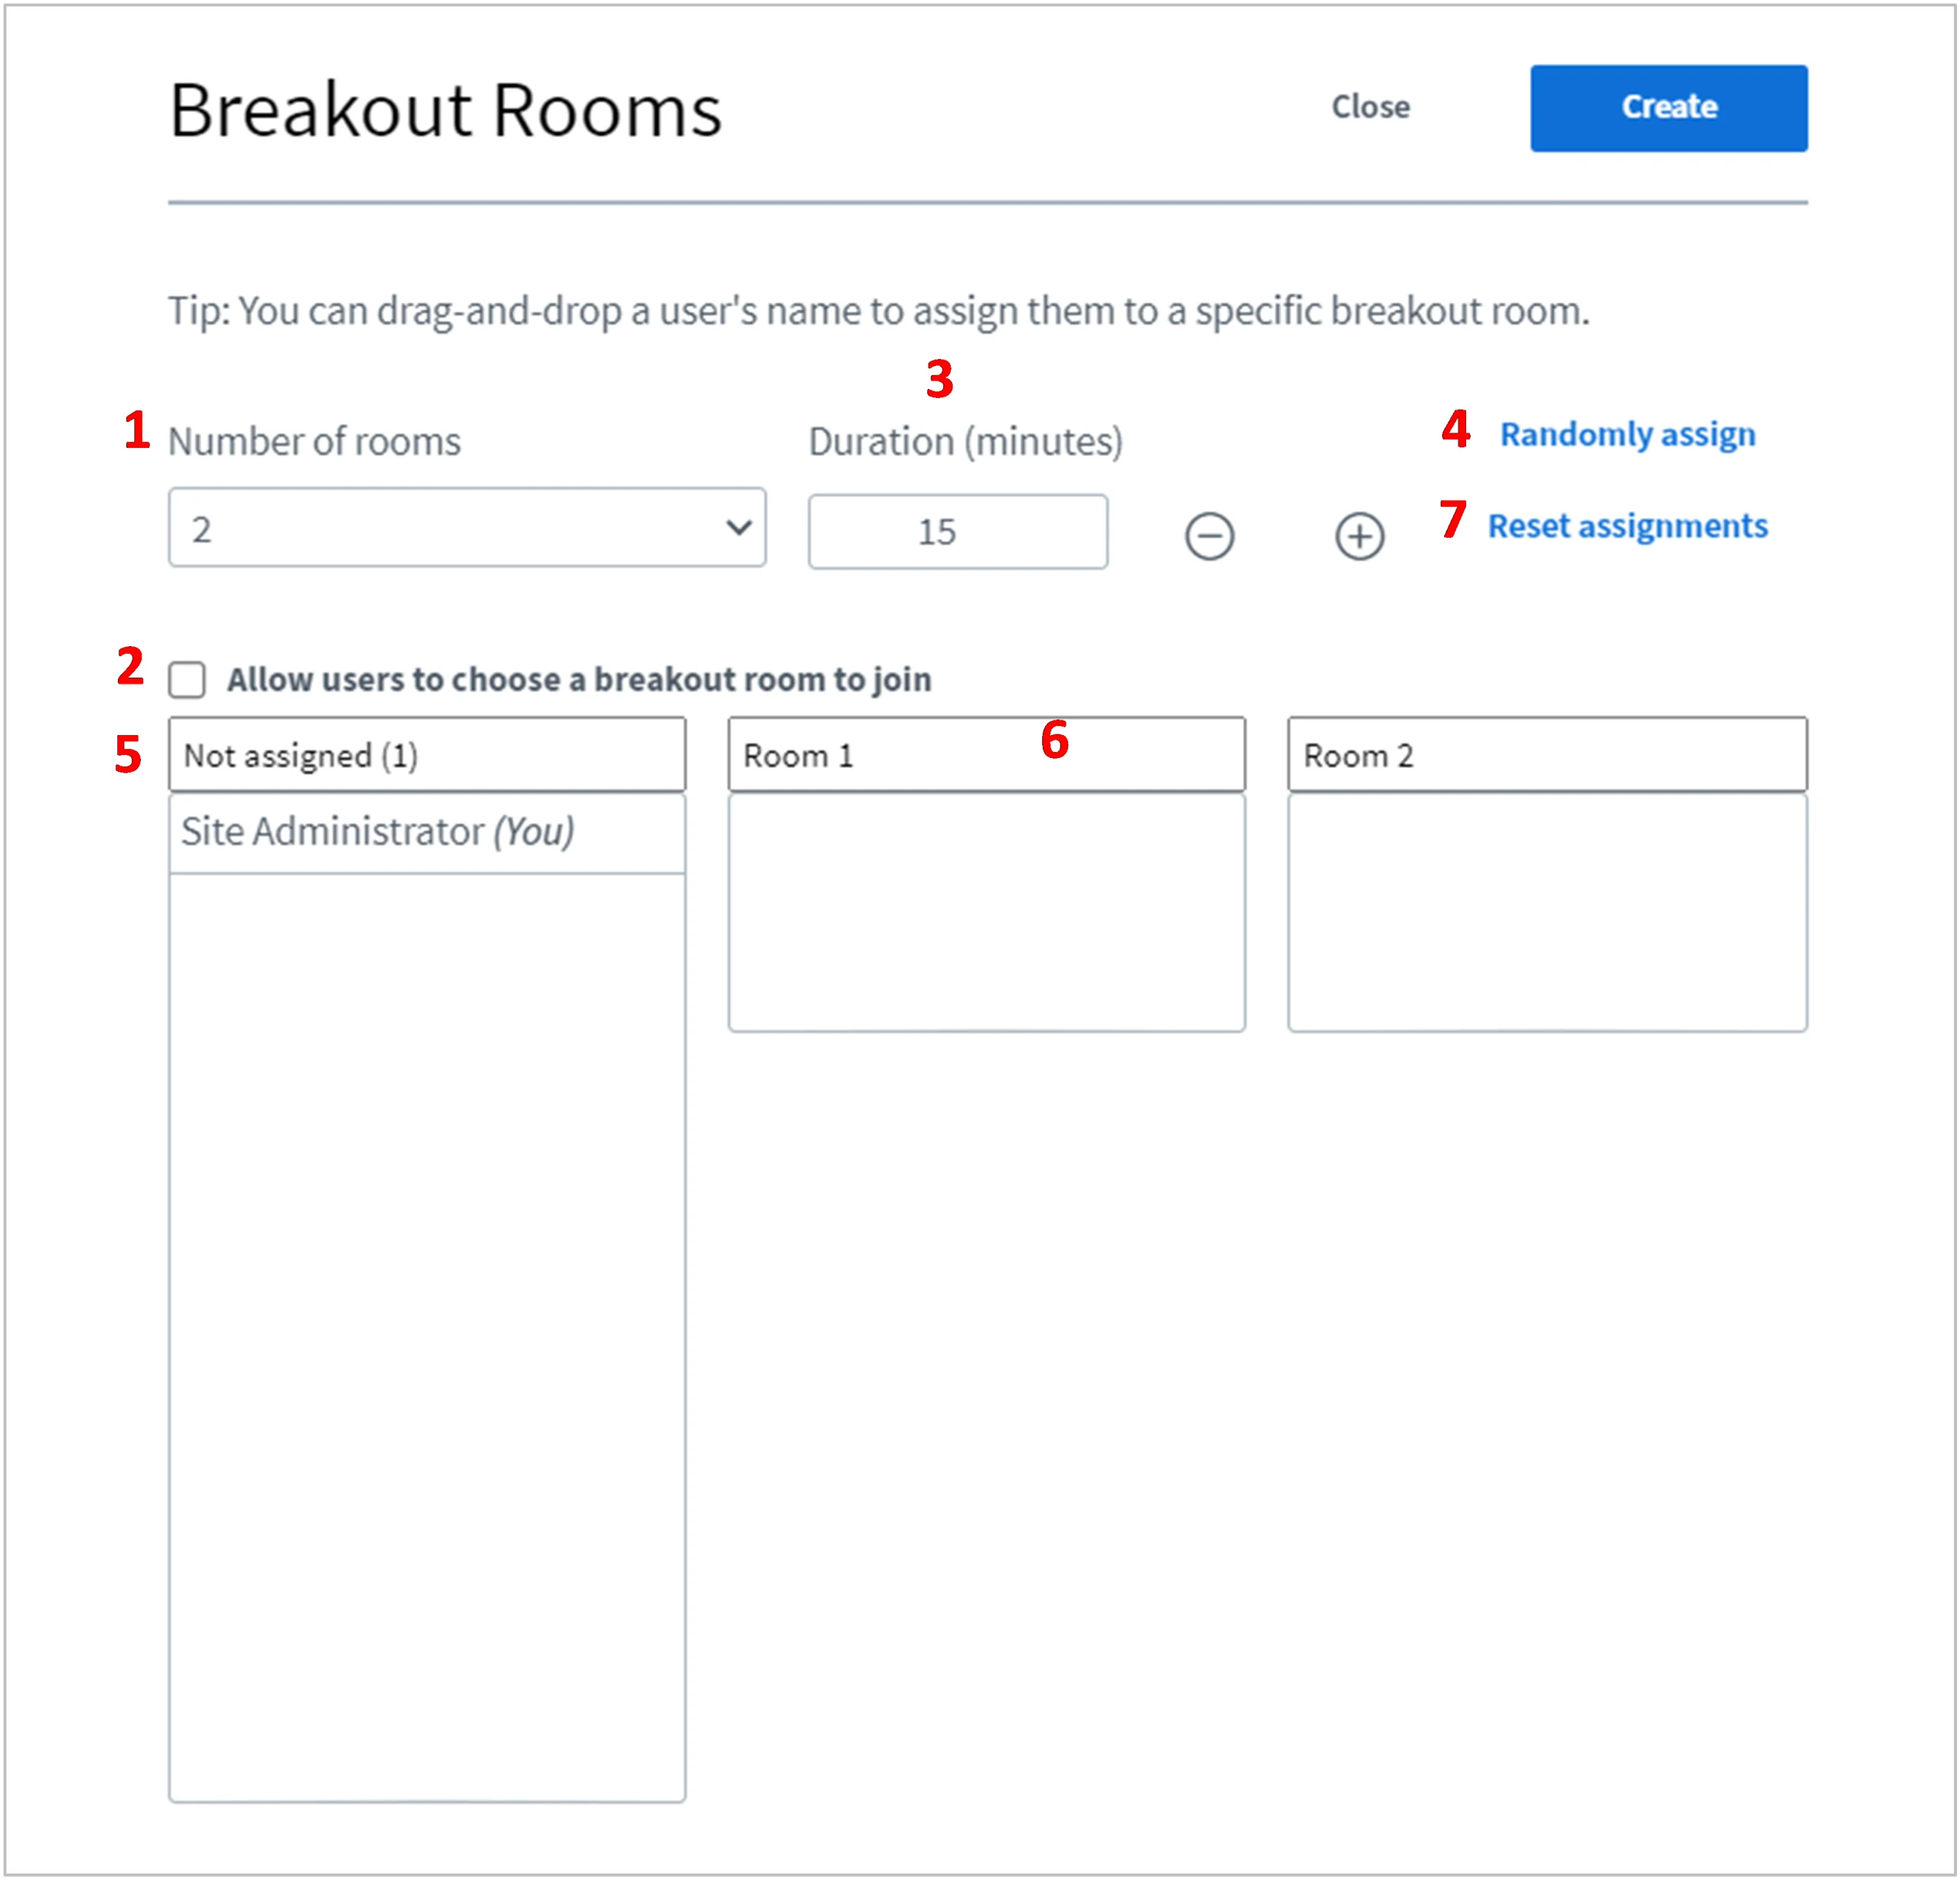
- The breakout room create panel will appear with the following inputs:
- [1] Number of rooms: The default number of rooms is set to 2. You can change this by selecting the drop-down button. The maximum rooms you can create is 24.
- [2] Allow users to choose a breakout room to join: This enables learners to select from a drop-down list of available breakout rooms when promoted.
- [3] Duration (minutes): All rooms will close once the duration time is met and learners will be brought back into the main meeting room. Increase or decrease the duration using the “-“ and “+” icons.
- [4] Randomly assigned: This enables BBB to randomly assign learners into a breakout room with even distribution in each room.
- [5] Not assigned: Learners who are not assigned a room will appear in this section.
- [6] Created rooms: Rooms created will appear in this section with assigned users.
- [7] Reset assignments: This resets the breakout room setup.

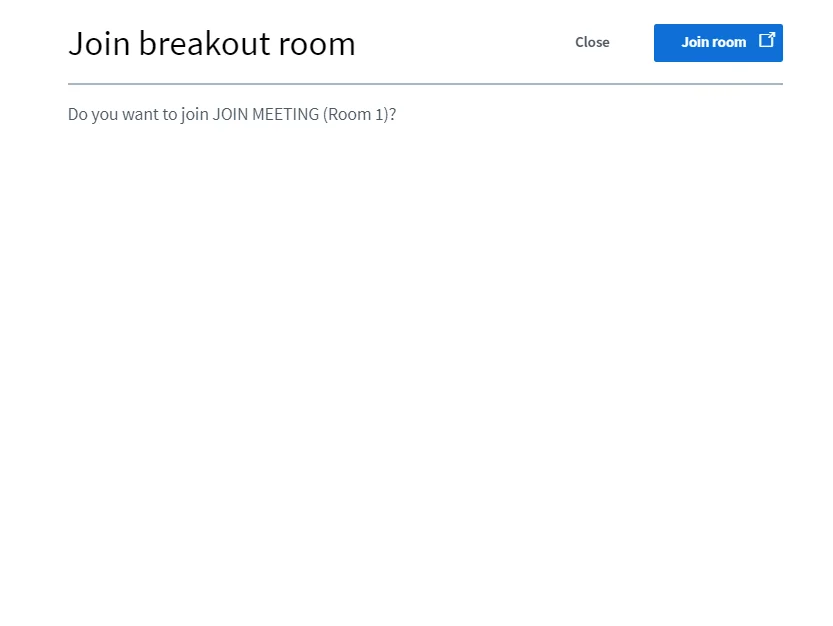
- Once the breakout rooms have been configured, select Create to launch. Learners will receive a prompt to join the respective room they have been assigned to.

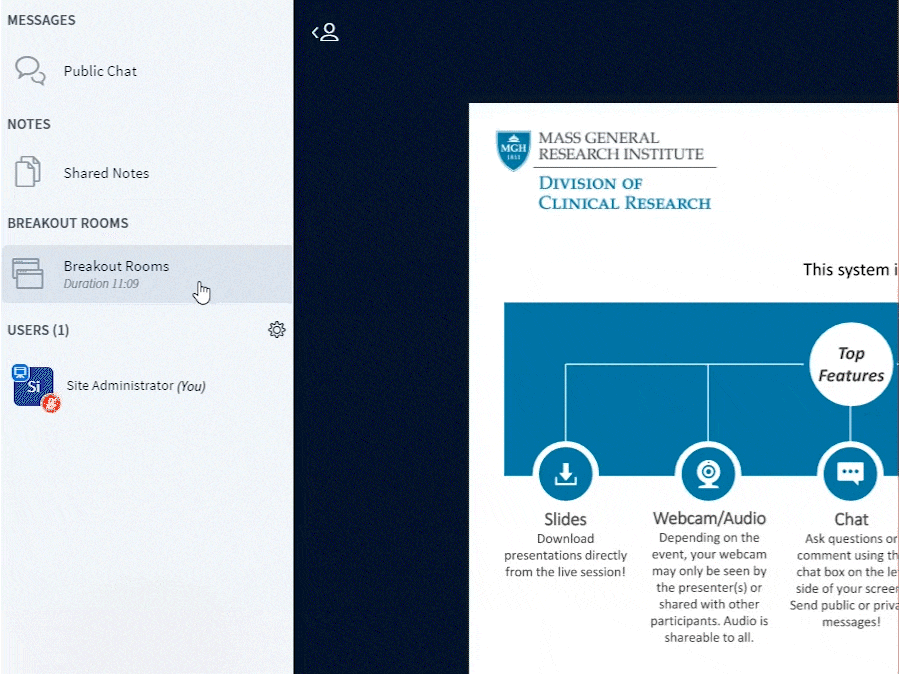
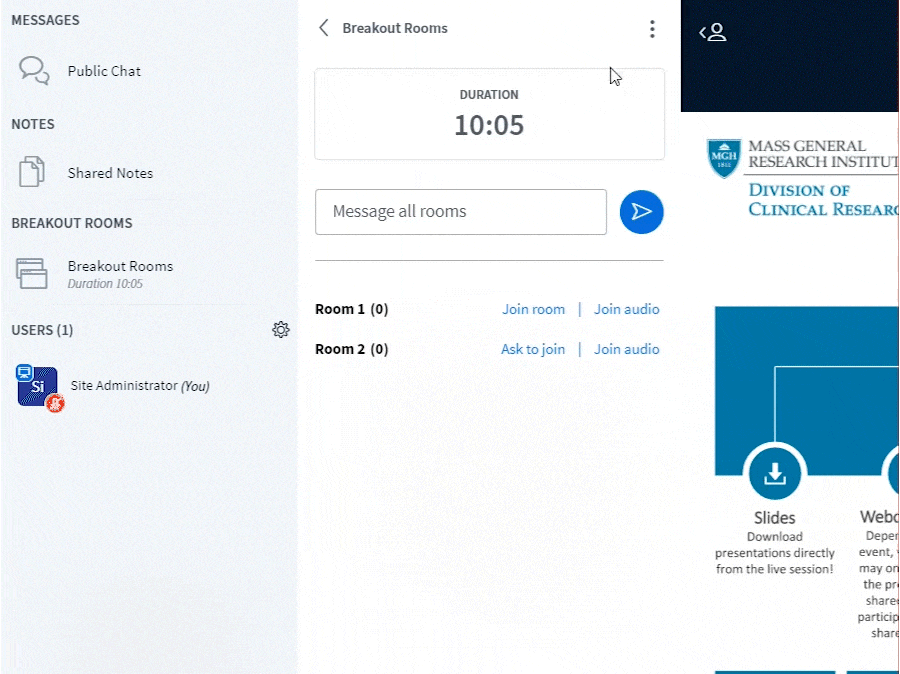
- Once the breakout rooms are created and learners have successfully joined, you can manage and join the rooms from the Breakout Rooms control panel under messages and above the users list. Select Breakout Rooms to expand the panel and view the active breakout rooms, number, and names of attendees in each room.
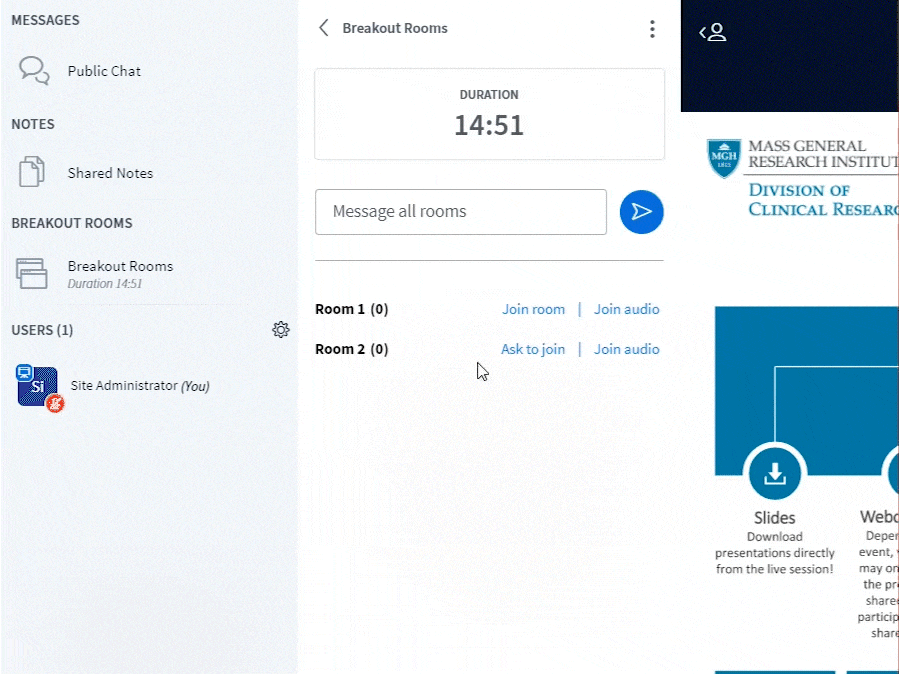
- There is the option to Join room or Join audio. If you select Join room, you will join the breakout room directly. If you select Join audio¸ you will be able to listen in on the breakout room selected. This does not prompt you to join the room directly.
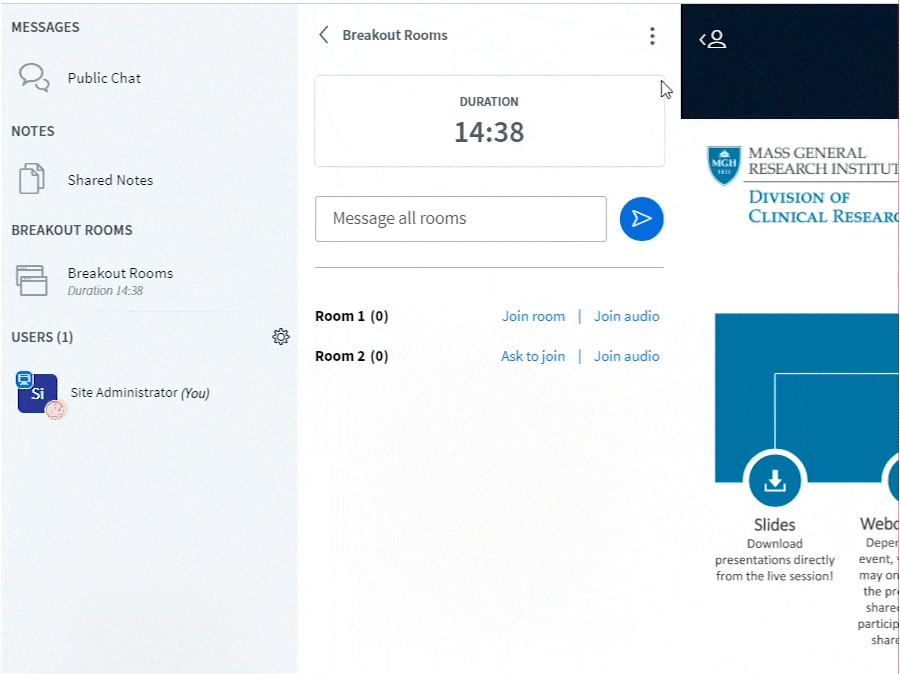
- To broadcast a message to all breakout rooms, type your message in the message input field and click the send message icon.
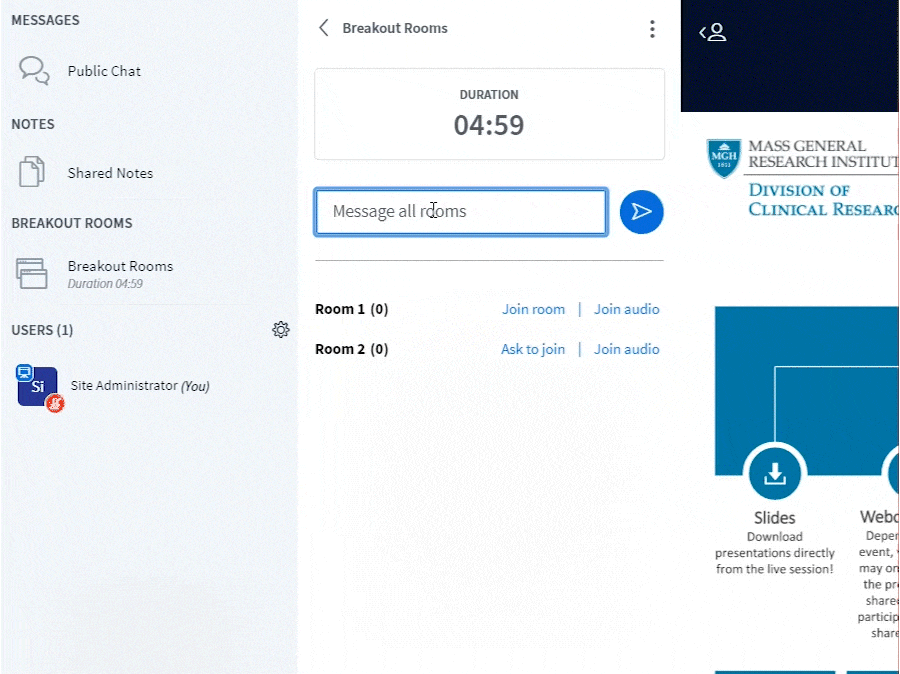
- Click on the Breakout options icon to reveal the options to change the breakout room duration or end all breakout rooms.
- When Change duration is selected, you have the option to change the duration in the Set duration input field. Click Apply to update the duration time.
- When End breakout rooms is selected, all learners will return back to the main meeting room.

- At this time Moderators cannot be randomly assigned to a breakout room in the Breakout room create panel.
- At this time breakout rooms cannot be recorded.
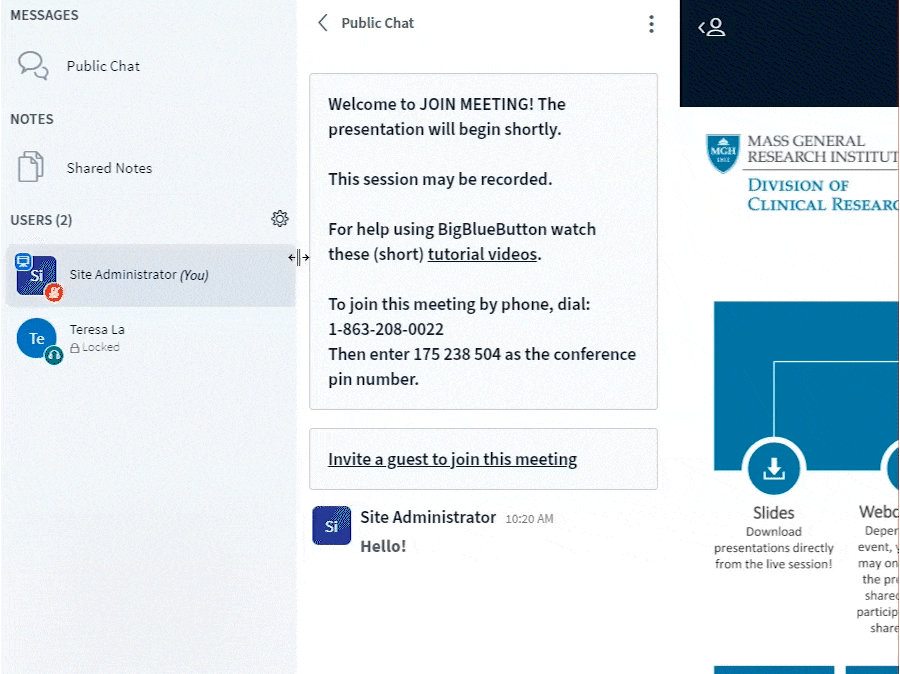
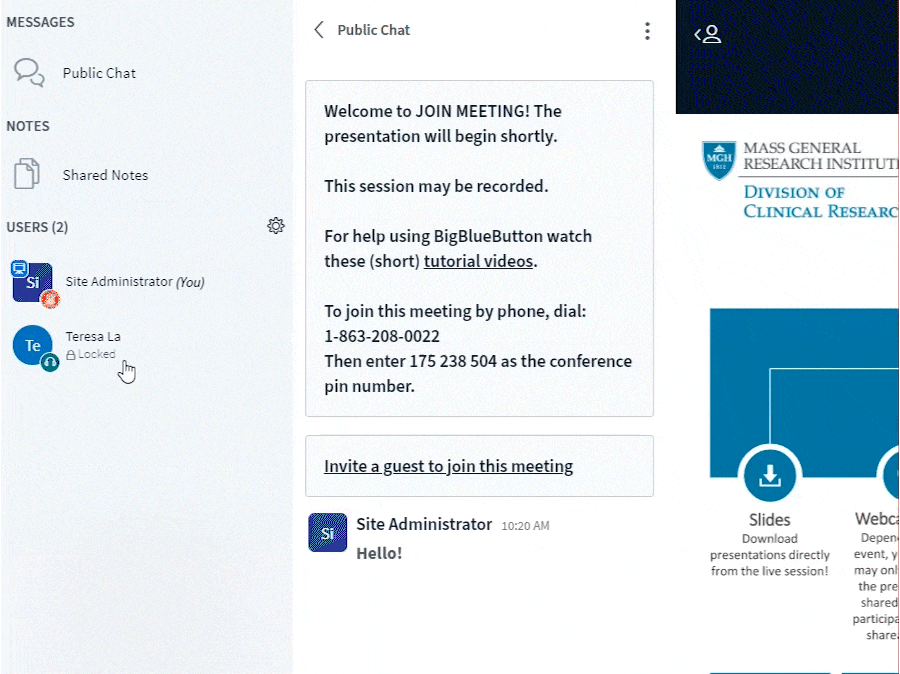
How to Use Public Channel for Messaging
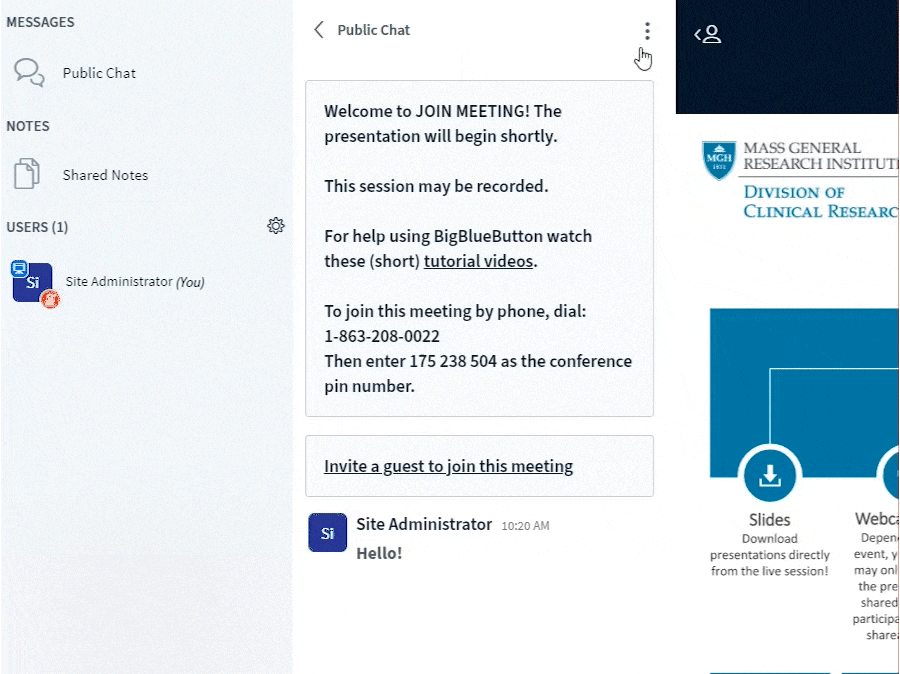
- To send a message, click on chat input field to type the message into the public chat, then select the send button.
- To save or download the public chat, select the chat options ellipse button in the right-upper hand corner of the public chat panel. Select save or copy.
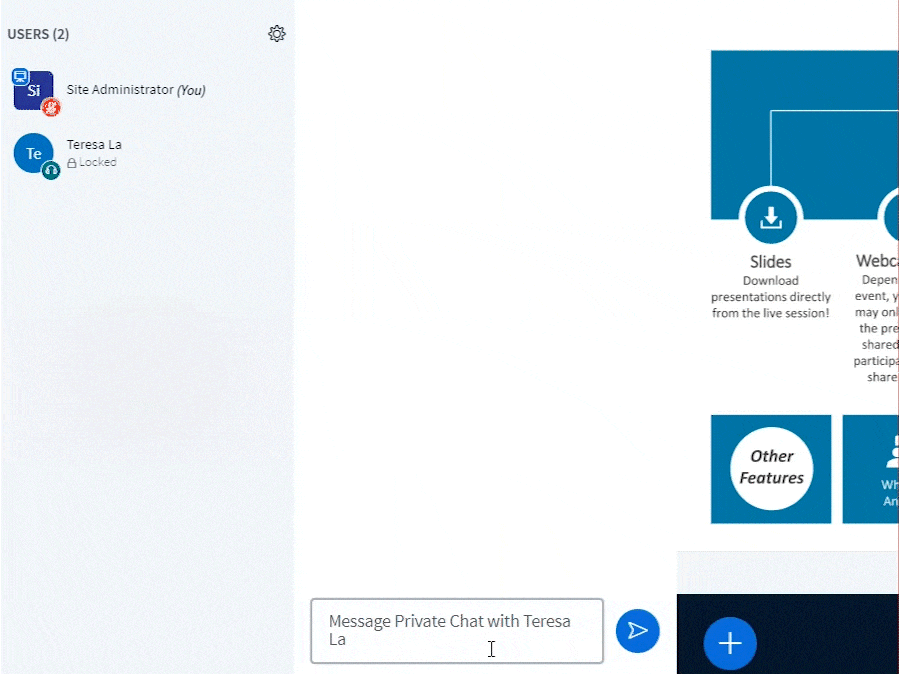
How to Send a Private Message to an Individual User
- To send a private chat, select the user’s name (a pop-up menu will appear), choose Start a private chat.
- Type your message in the chat input field, then select the send button.
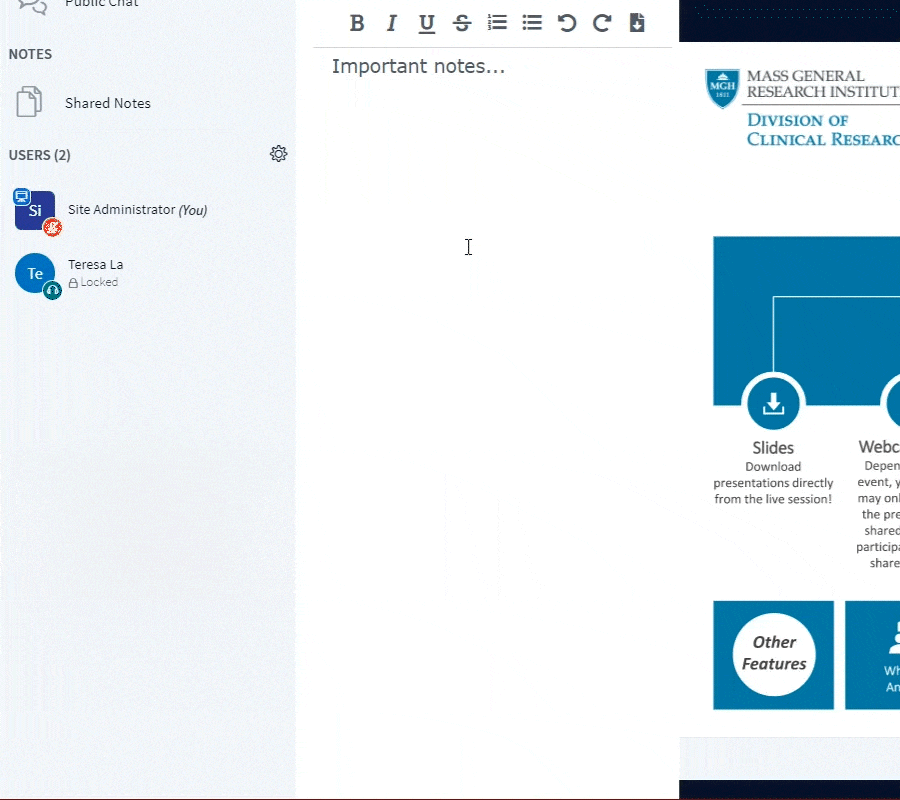
- Select Shared Notes to expand the notes panel. Use the formatting options to format your notes.
- To download the current note pad, select the Import/Export button and choose from the following options: Etherpad, HTML, Plain text, Microsoft Word, PDF, or ODF.

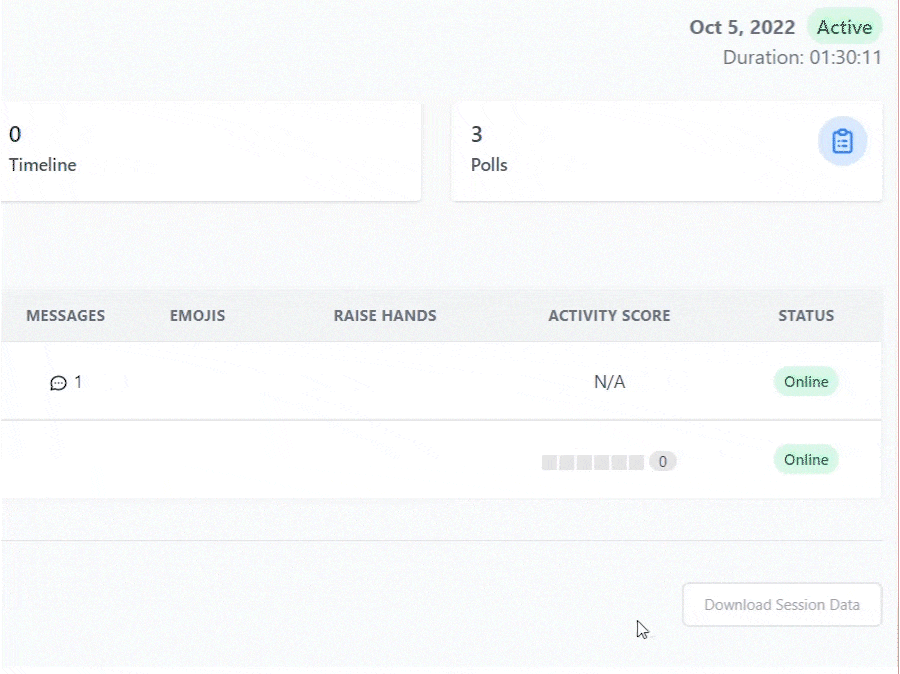
How to Access the Learning Analytics Dashboard for the User List Panel
The learning analytics dashboard offers real-time monitoring, visualization, and capture of user events in the BBB session. This live learning dashboard can inform you and add valuable insight on learner engagement.
- To access the dashboard, click on the gear icon in the upper-right corner of the users list panel, then select Learning Analytics Dashboard.
- On the dashboard, scroll down and select Download session data to export the engagement report.